How-to Guide
Download
Create an account
Tap the [Get started] button on the app's top screen. If you received an invitation QR code from your family, tap the [I have an invitation] button.
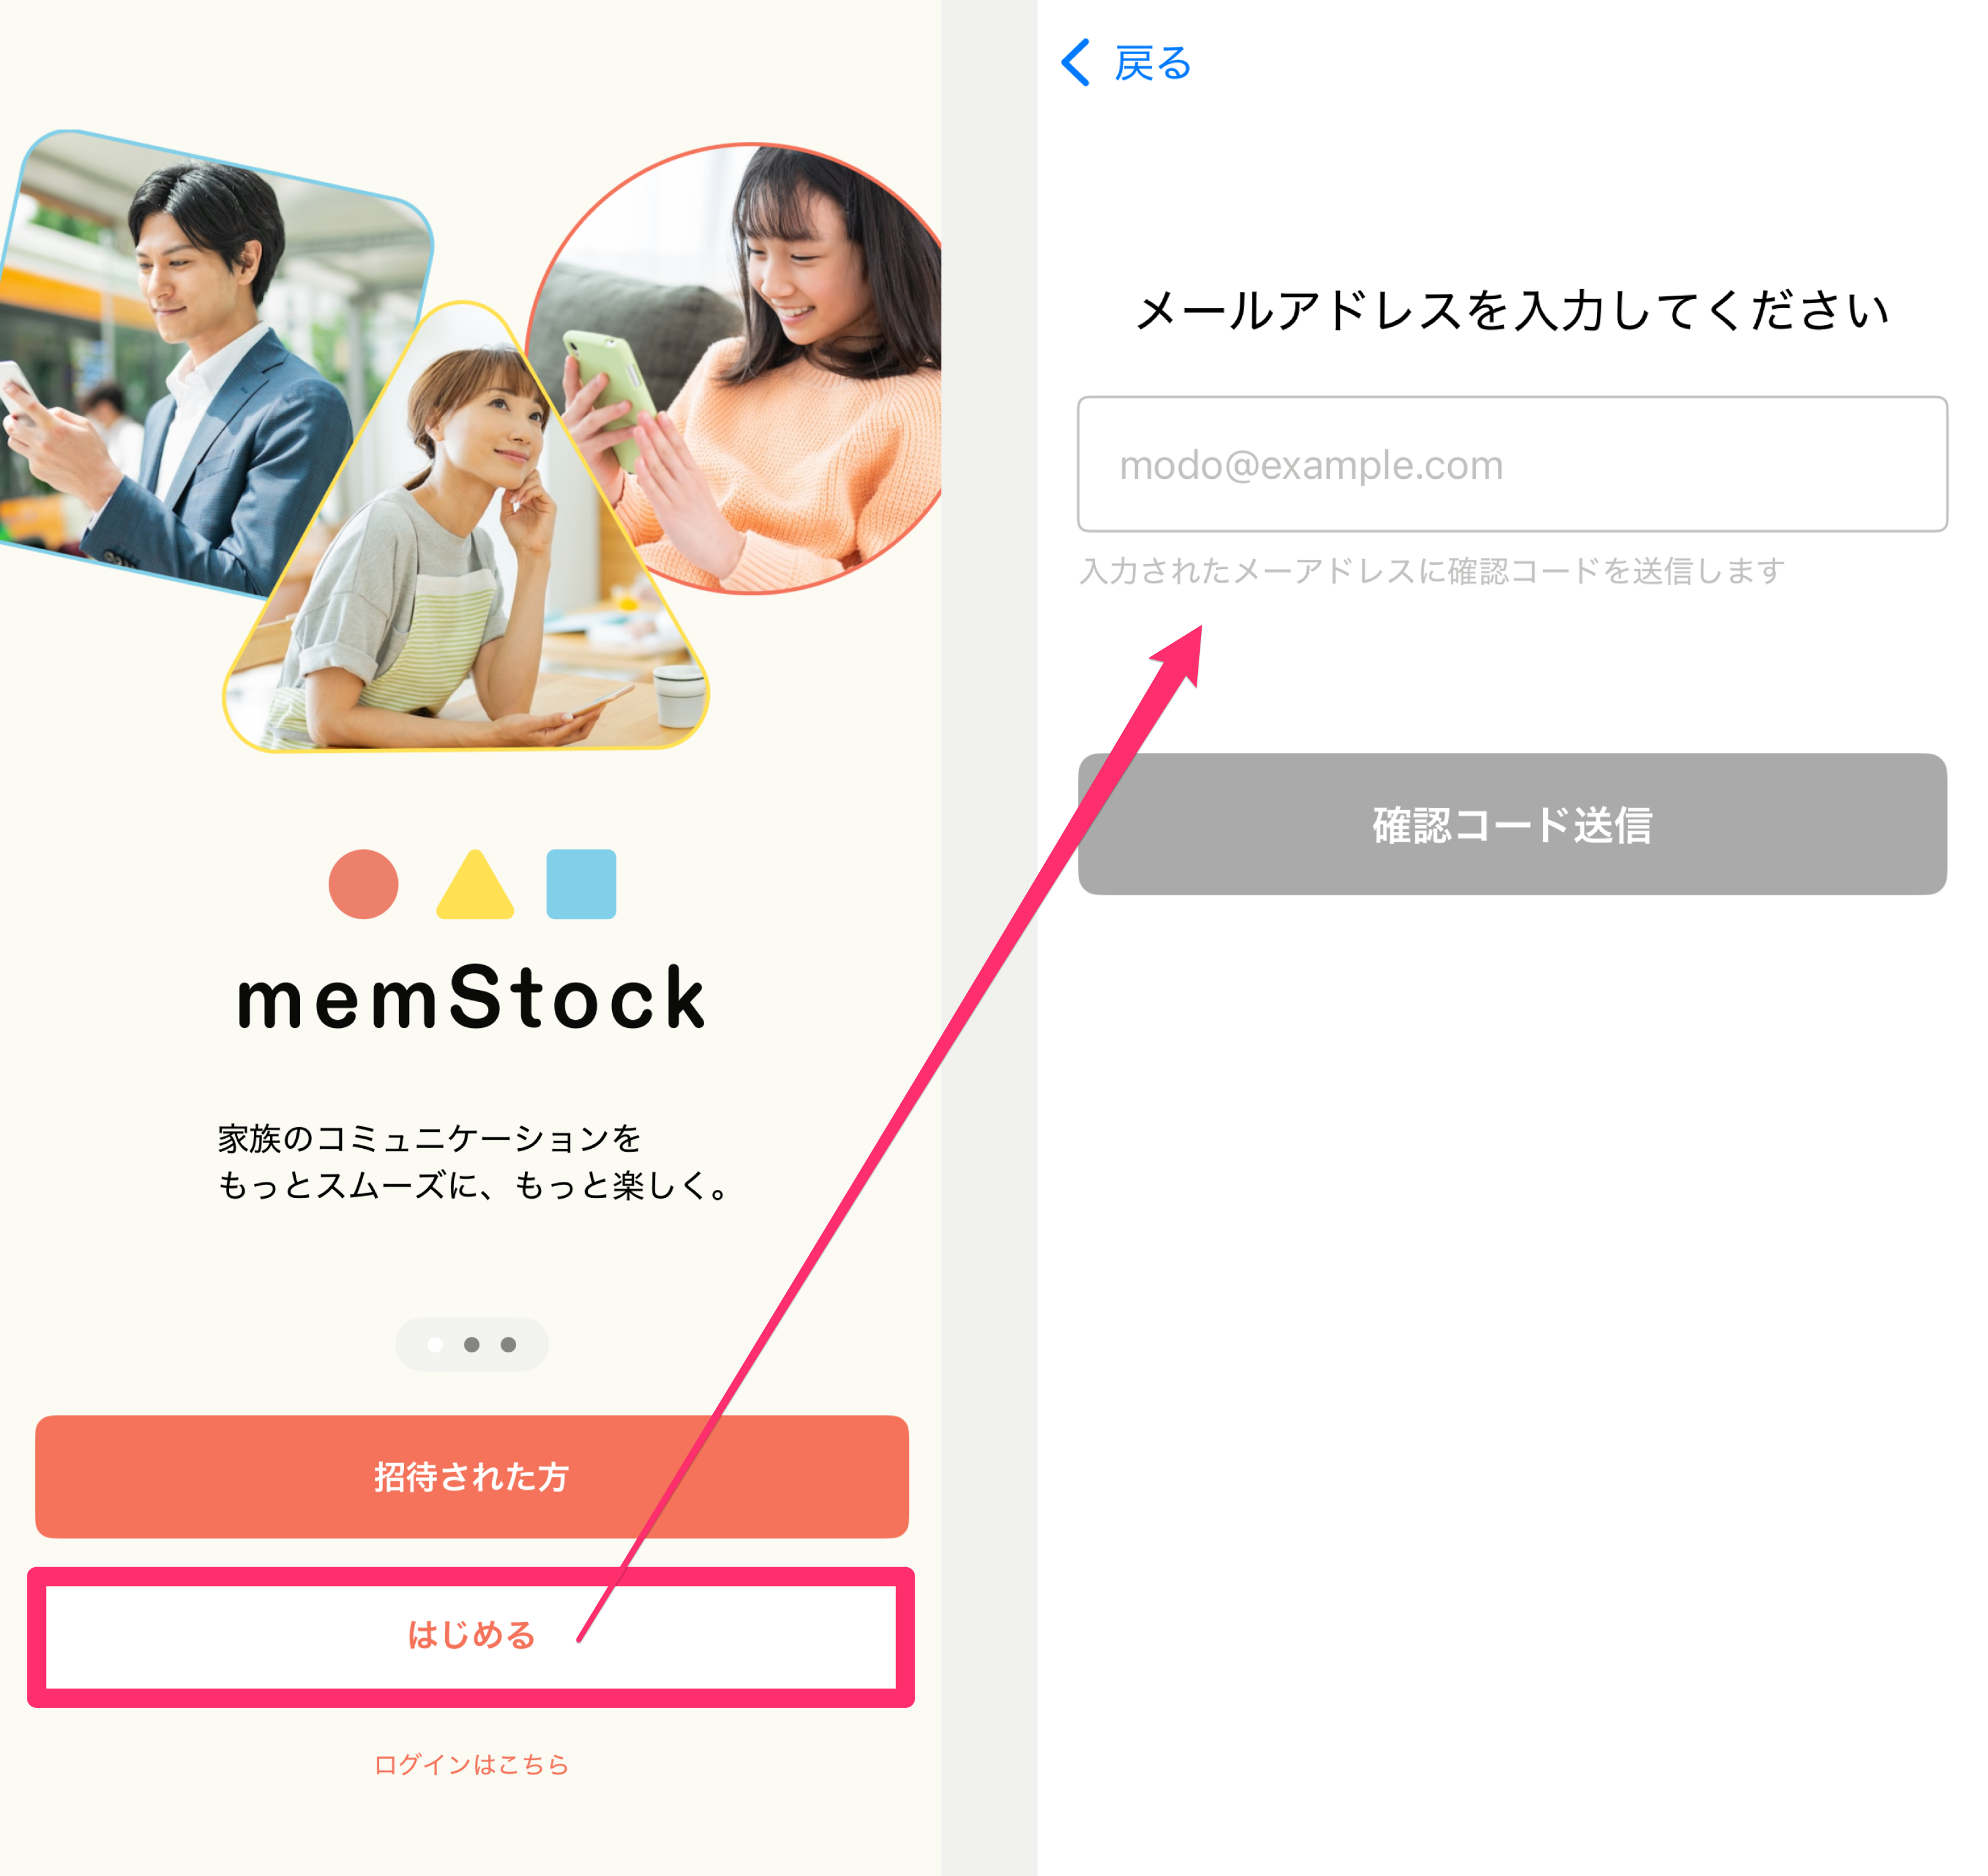
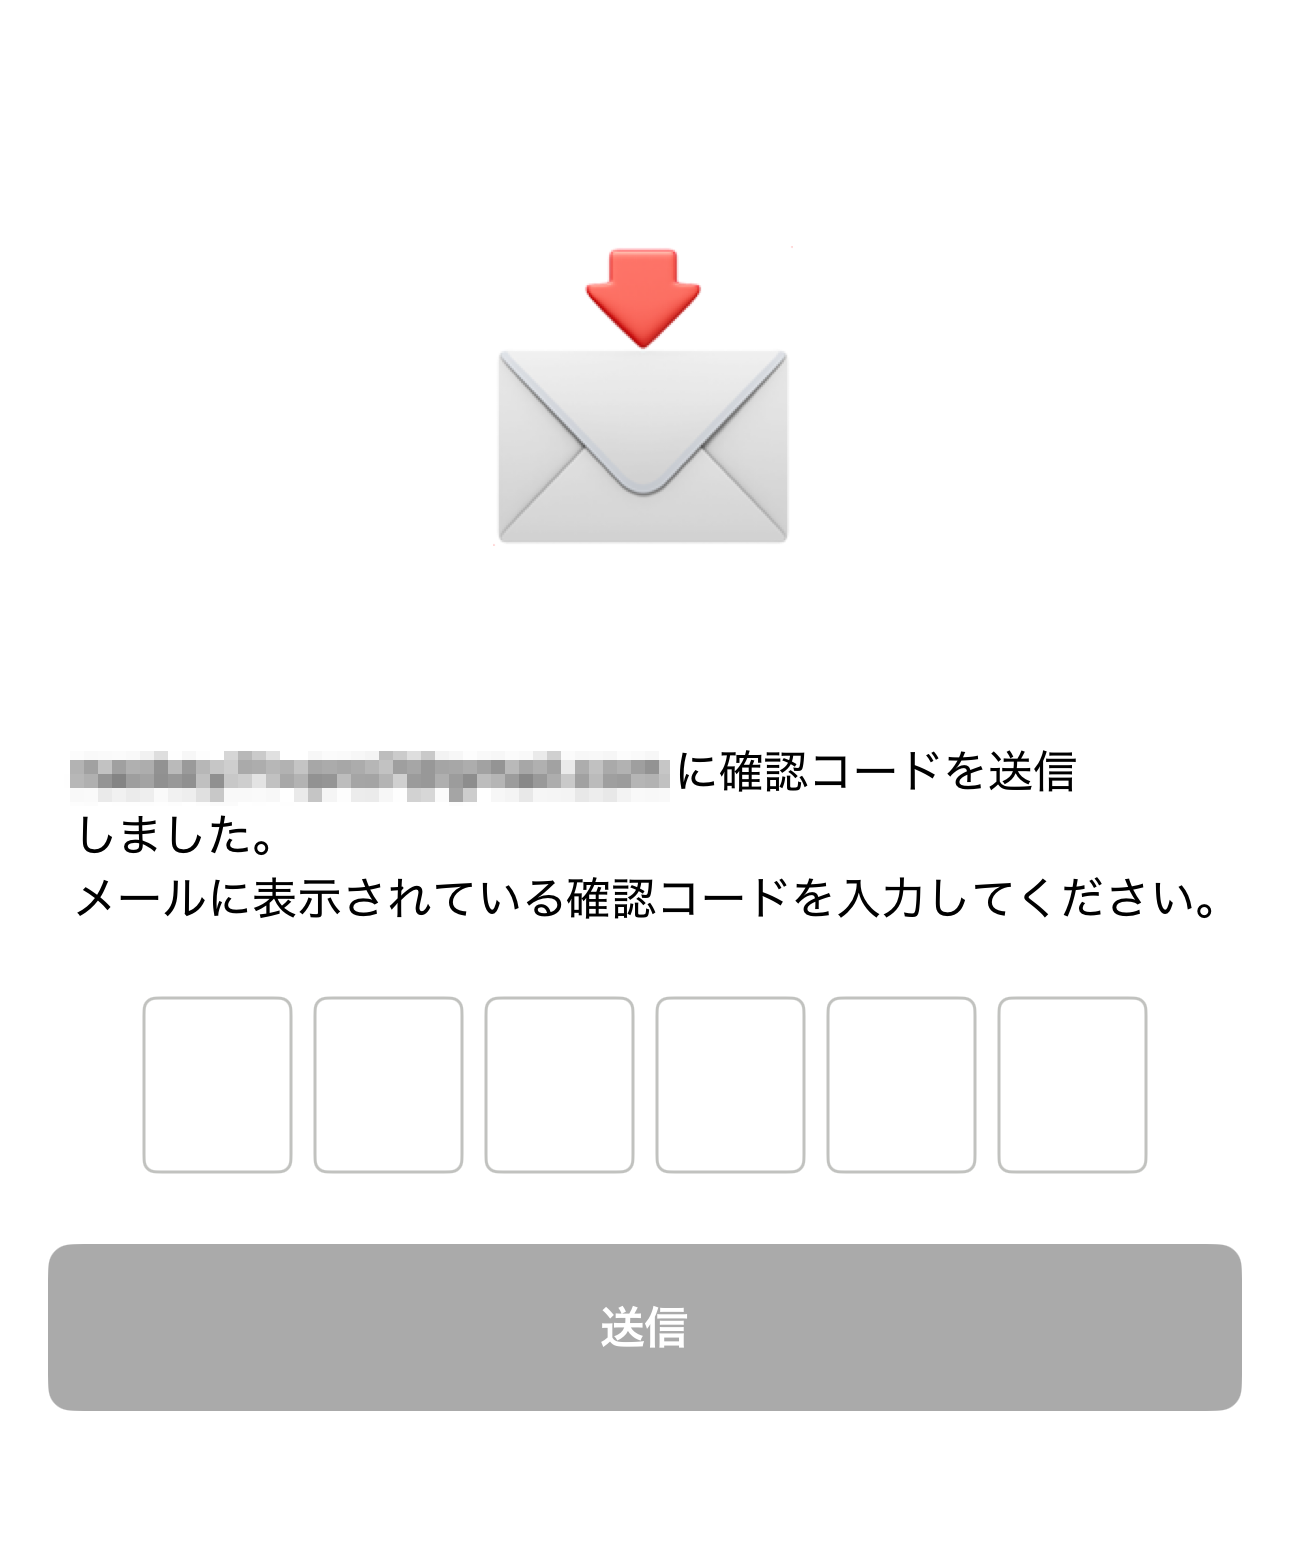
Enter your email address and tap [Send verification code], and an email with a 6-digit code will arrive. Enter the 6-digit code on the memStock screen to complete verification.
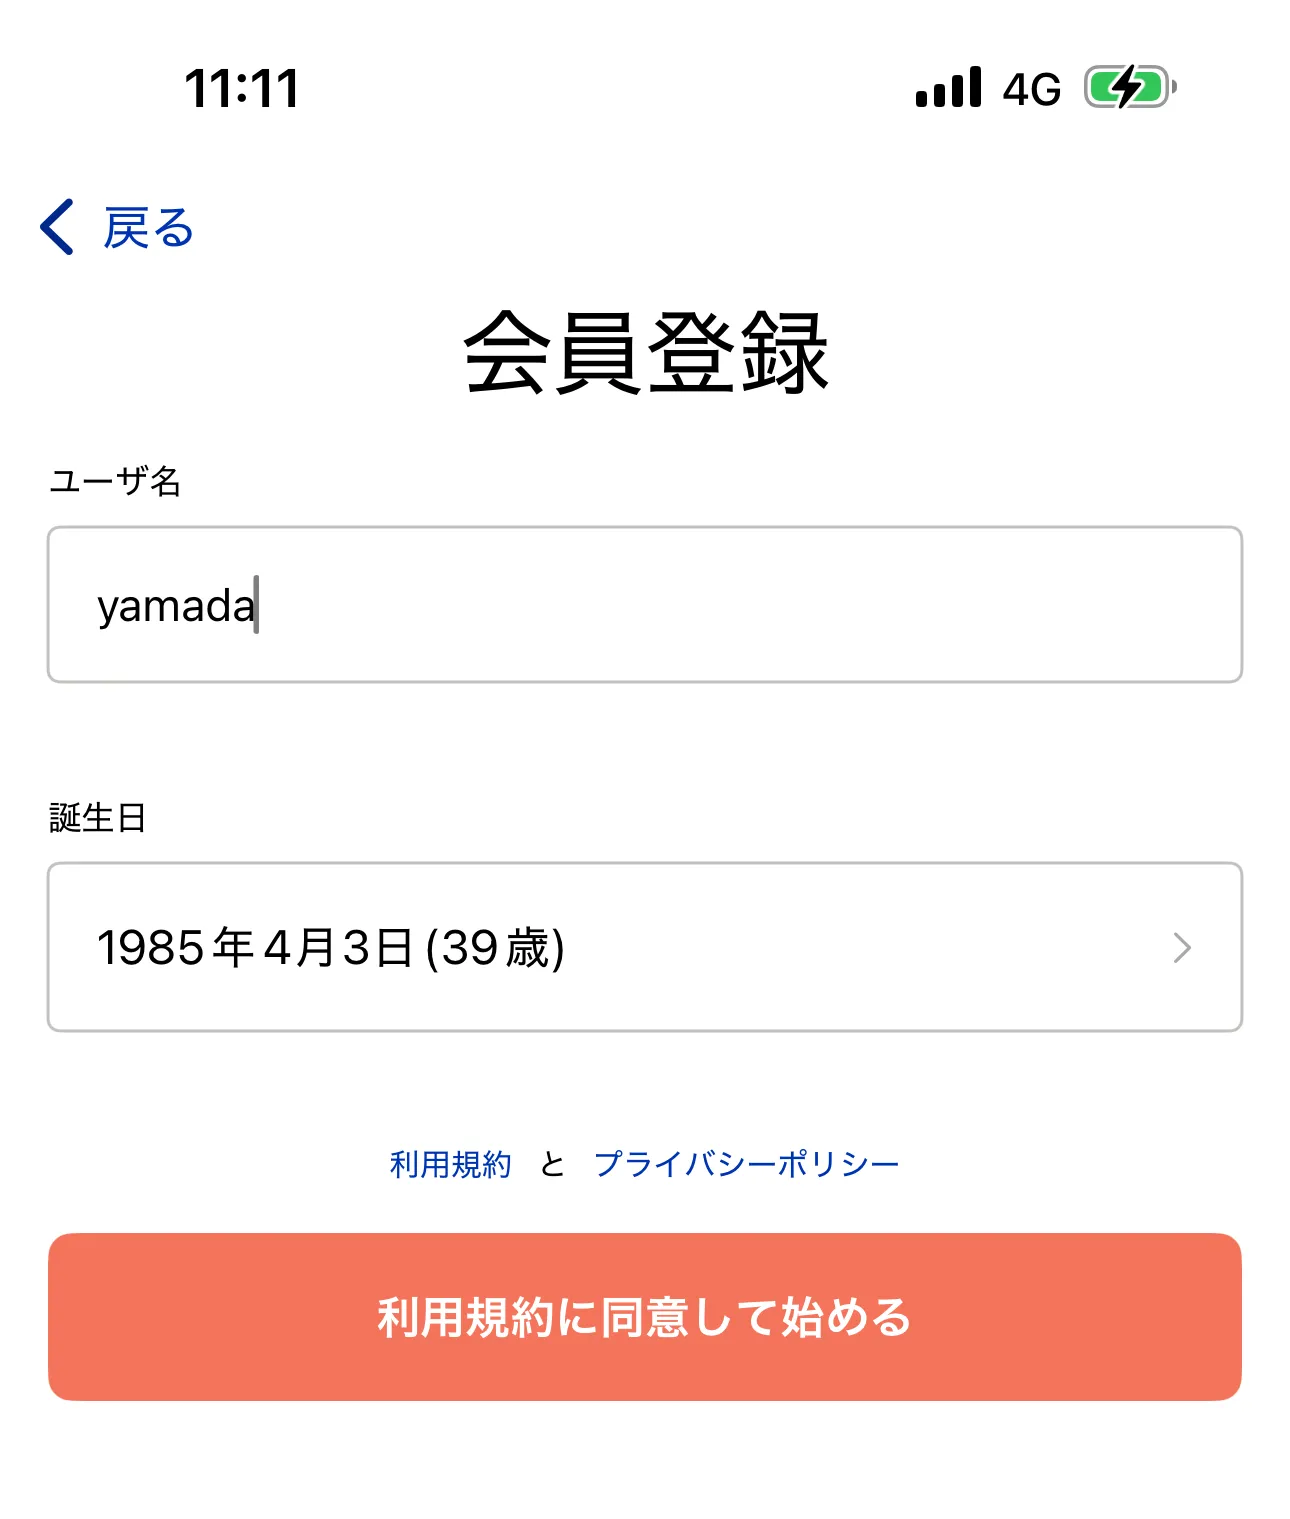
Create your account on the next screen.
After entering your username* and date of birth, review the Terms of Service and Privacy Policy and tap [Agree and get started] to finish creating your account.
*Your username is an account ID and is not shown to other users.
If you were invited
Open the invitation URL in the invitation message, or scan the invitation QR code, to proceed to the email verification screen.
The email verification steps are the same as in Create an account.
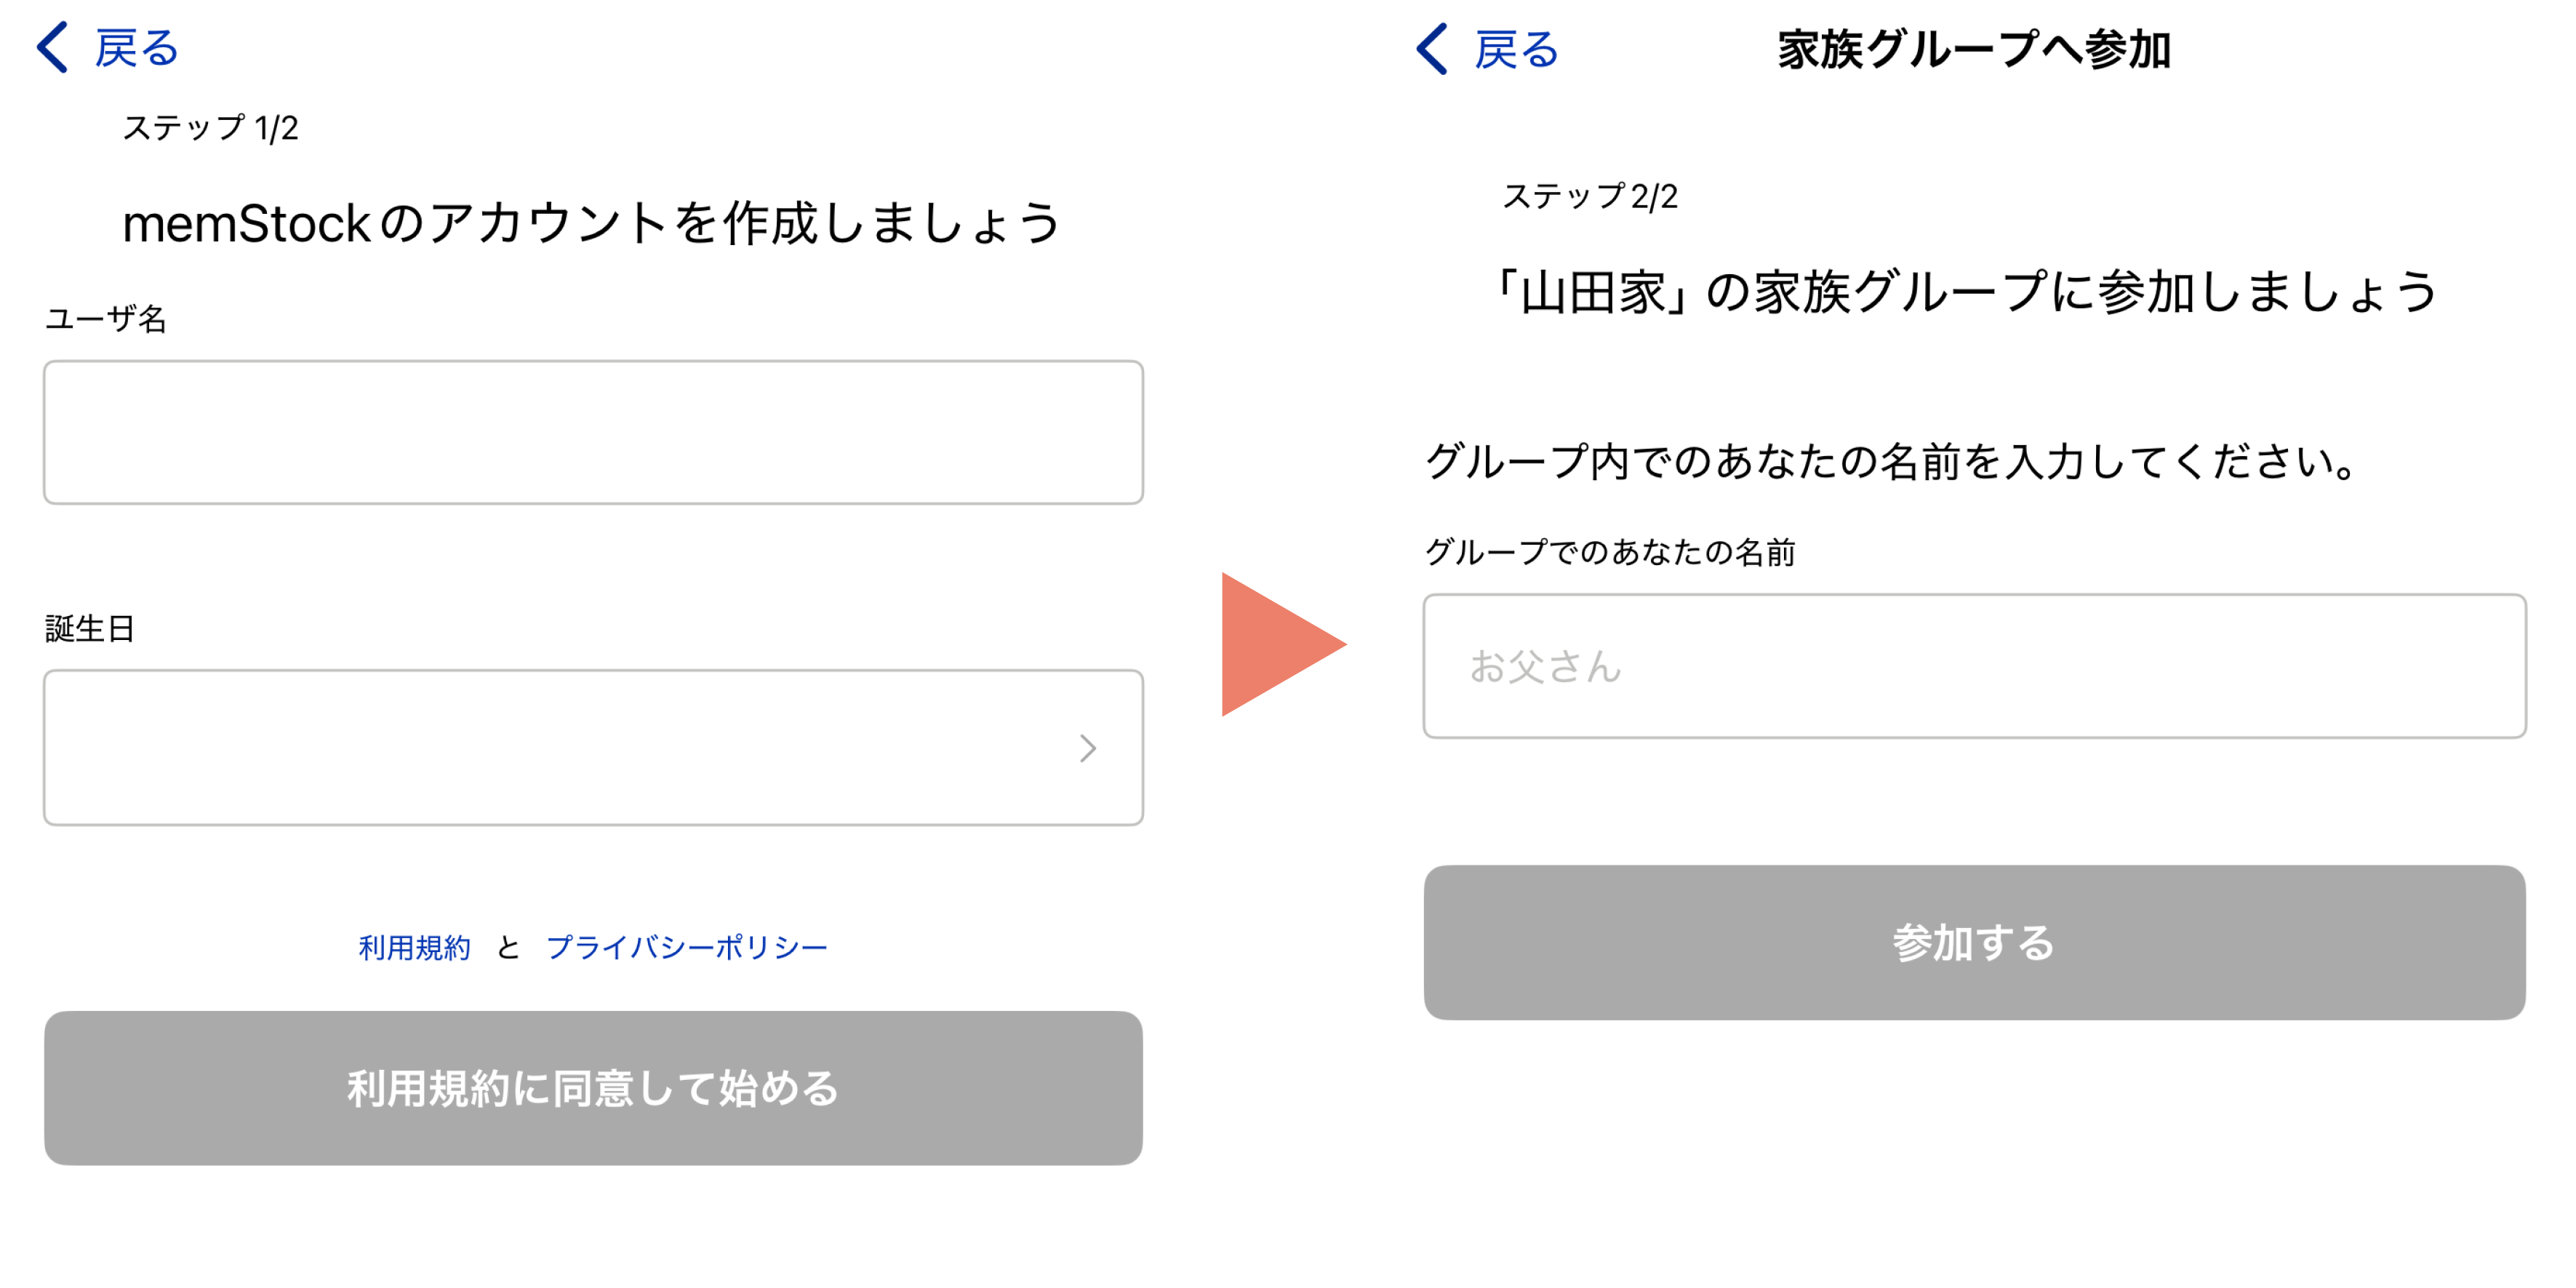
After email verification, you create an account in Step 1 and join the family group in Step 2.
*If you've already created an account, only Step 2 is needed.
Create a family group
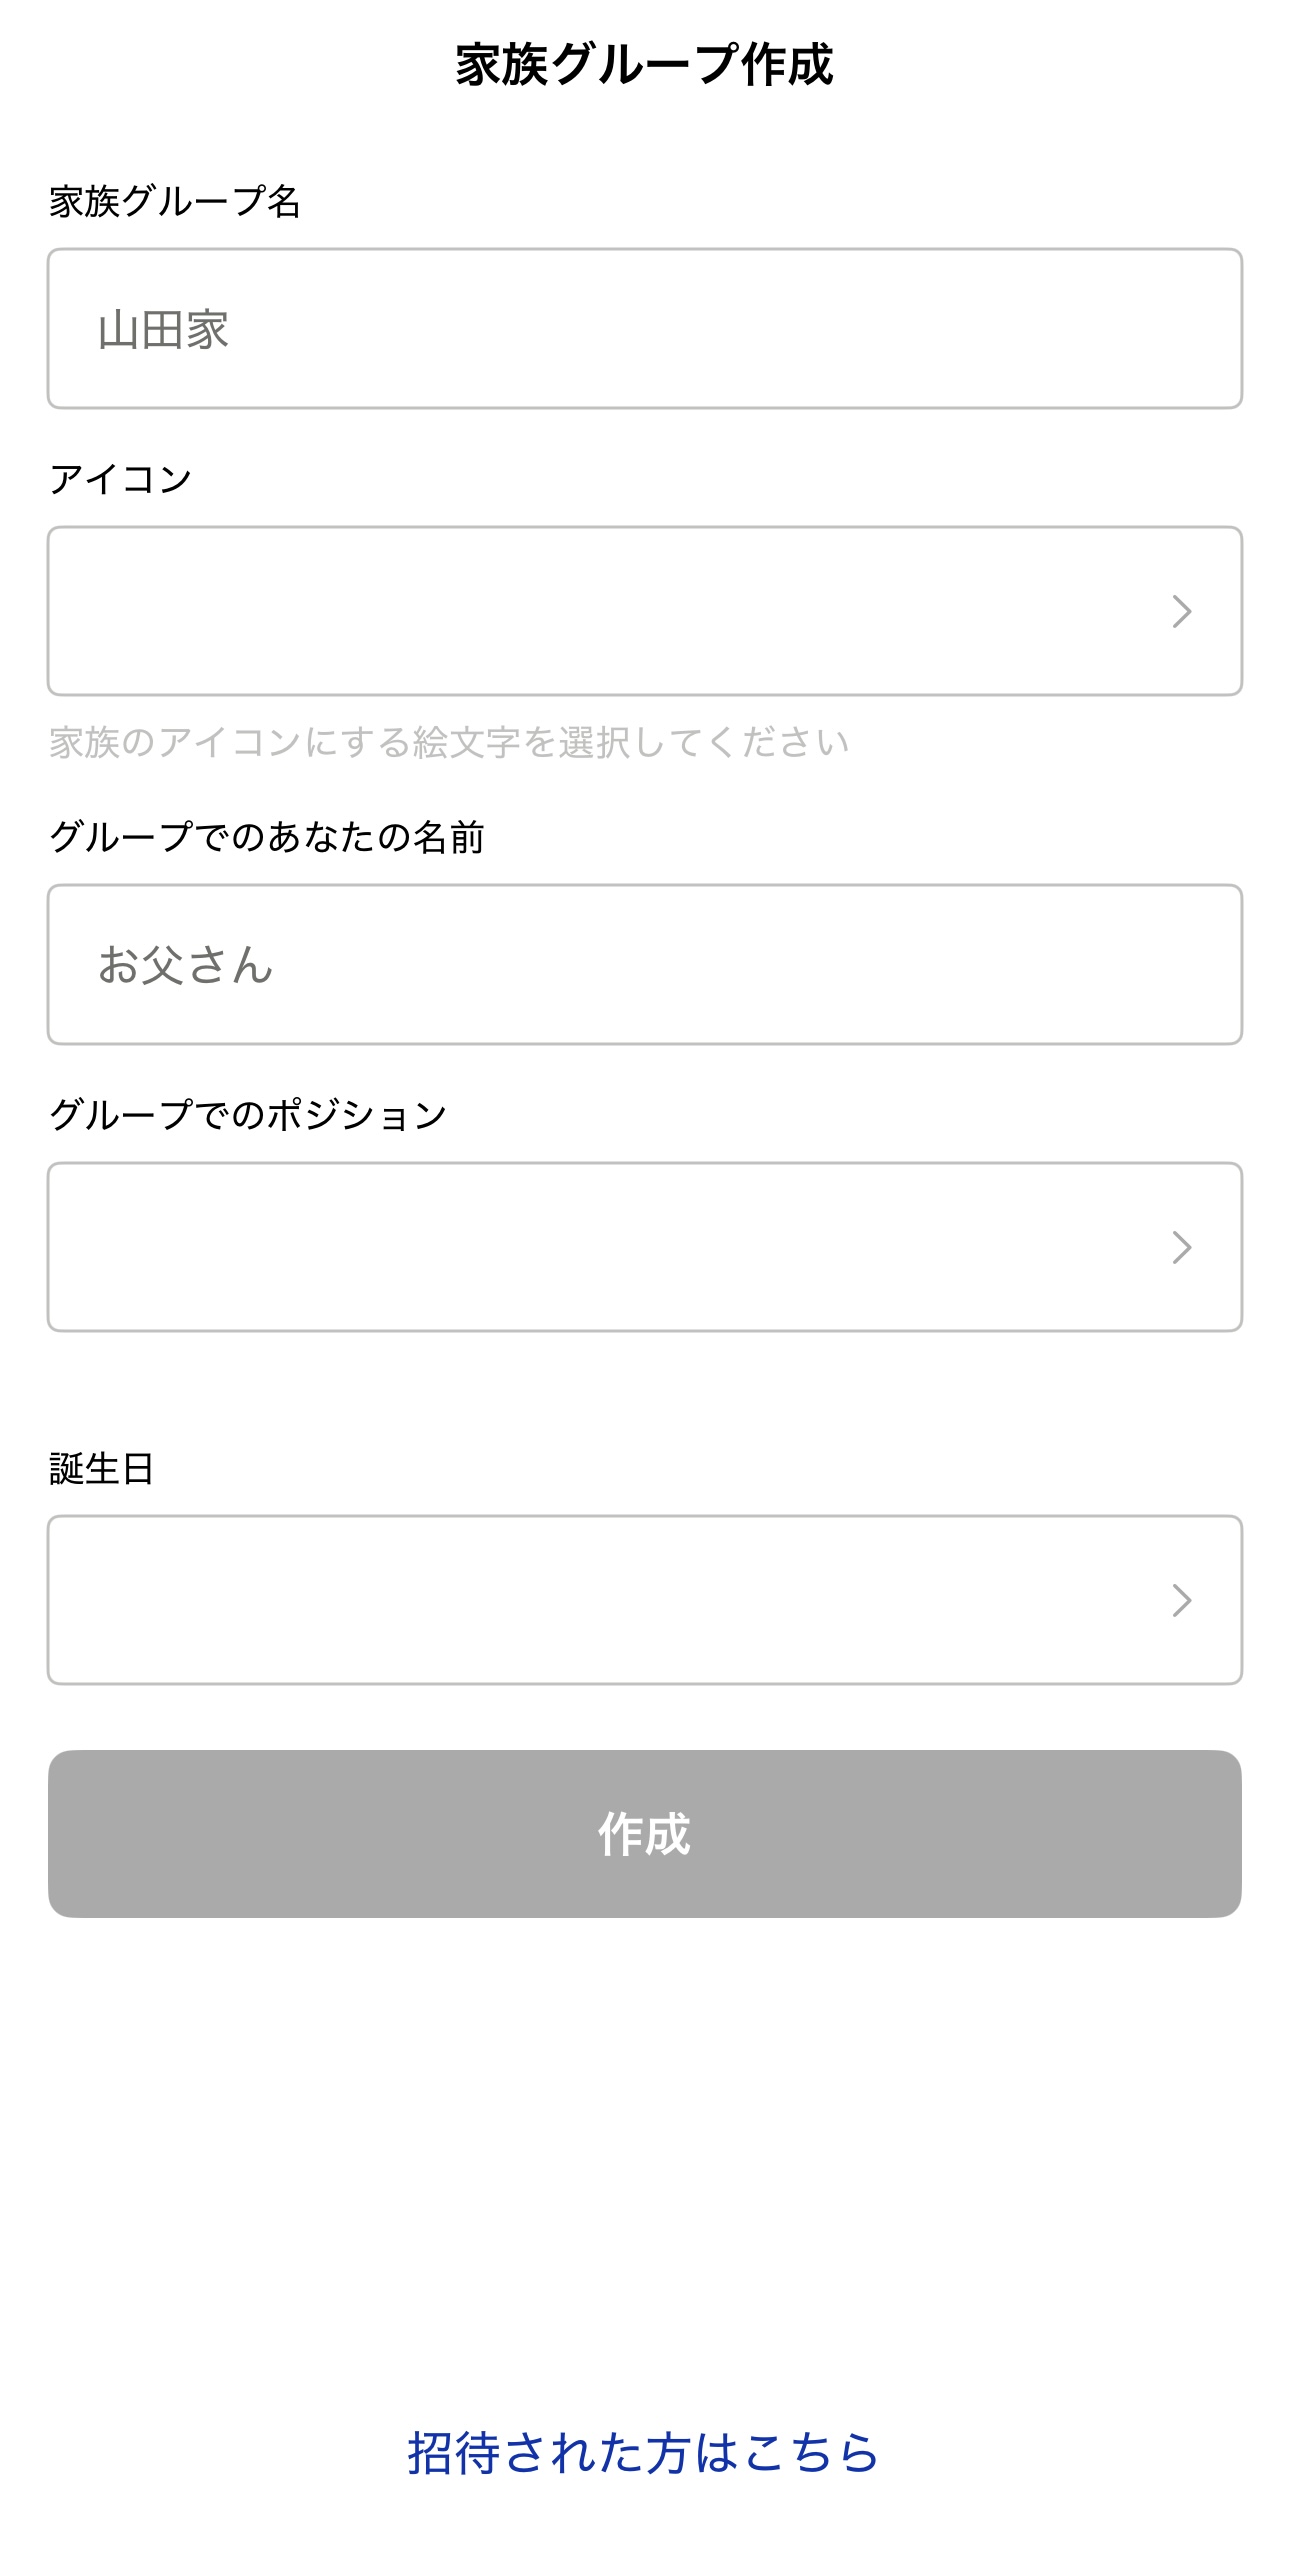
Create a group for the family you communicate with. You can add groups later, so start with the family you live with.
- Family group name Your family's name. Use your family surname or an easy-to-understand name that represents your family.
- Icon Choose freely from the emoji list.
- Your name in the group Use the name you're usually called by so your family recognizes you.
- Your relationship in the group Select your relationship within the family (e.g., Father, Daughter, Grandfather). If it's not in the list, select [Other] and enter it yourself.
- Date of birth Enter your date of birth.
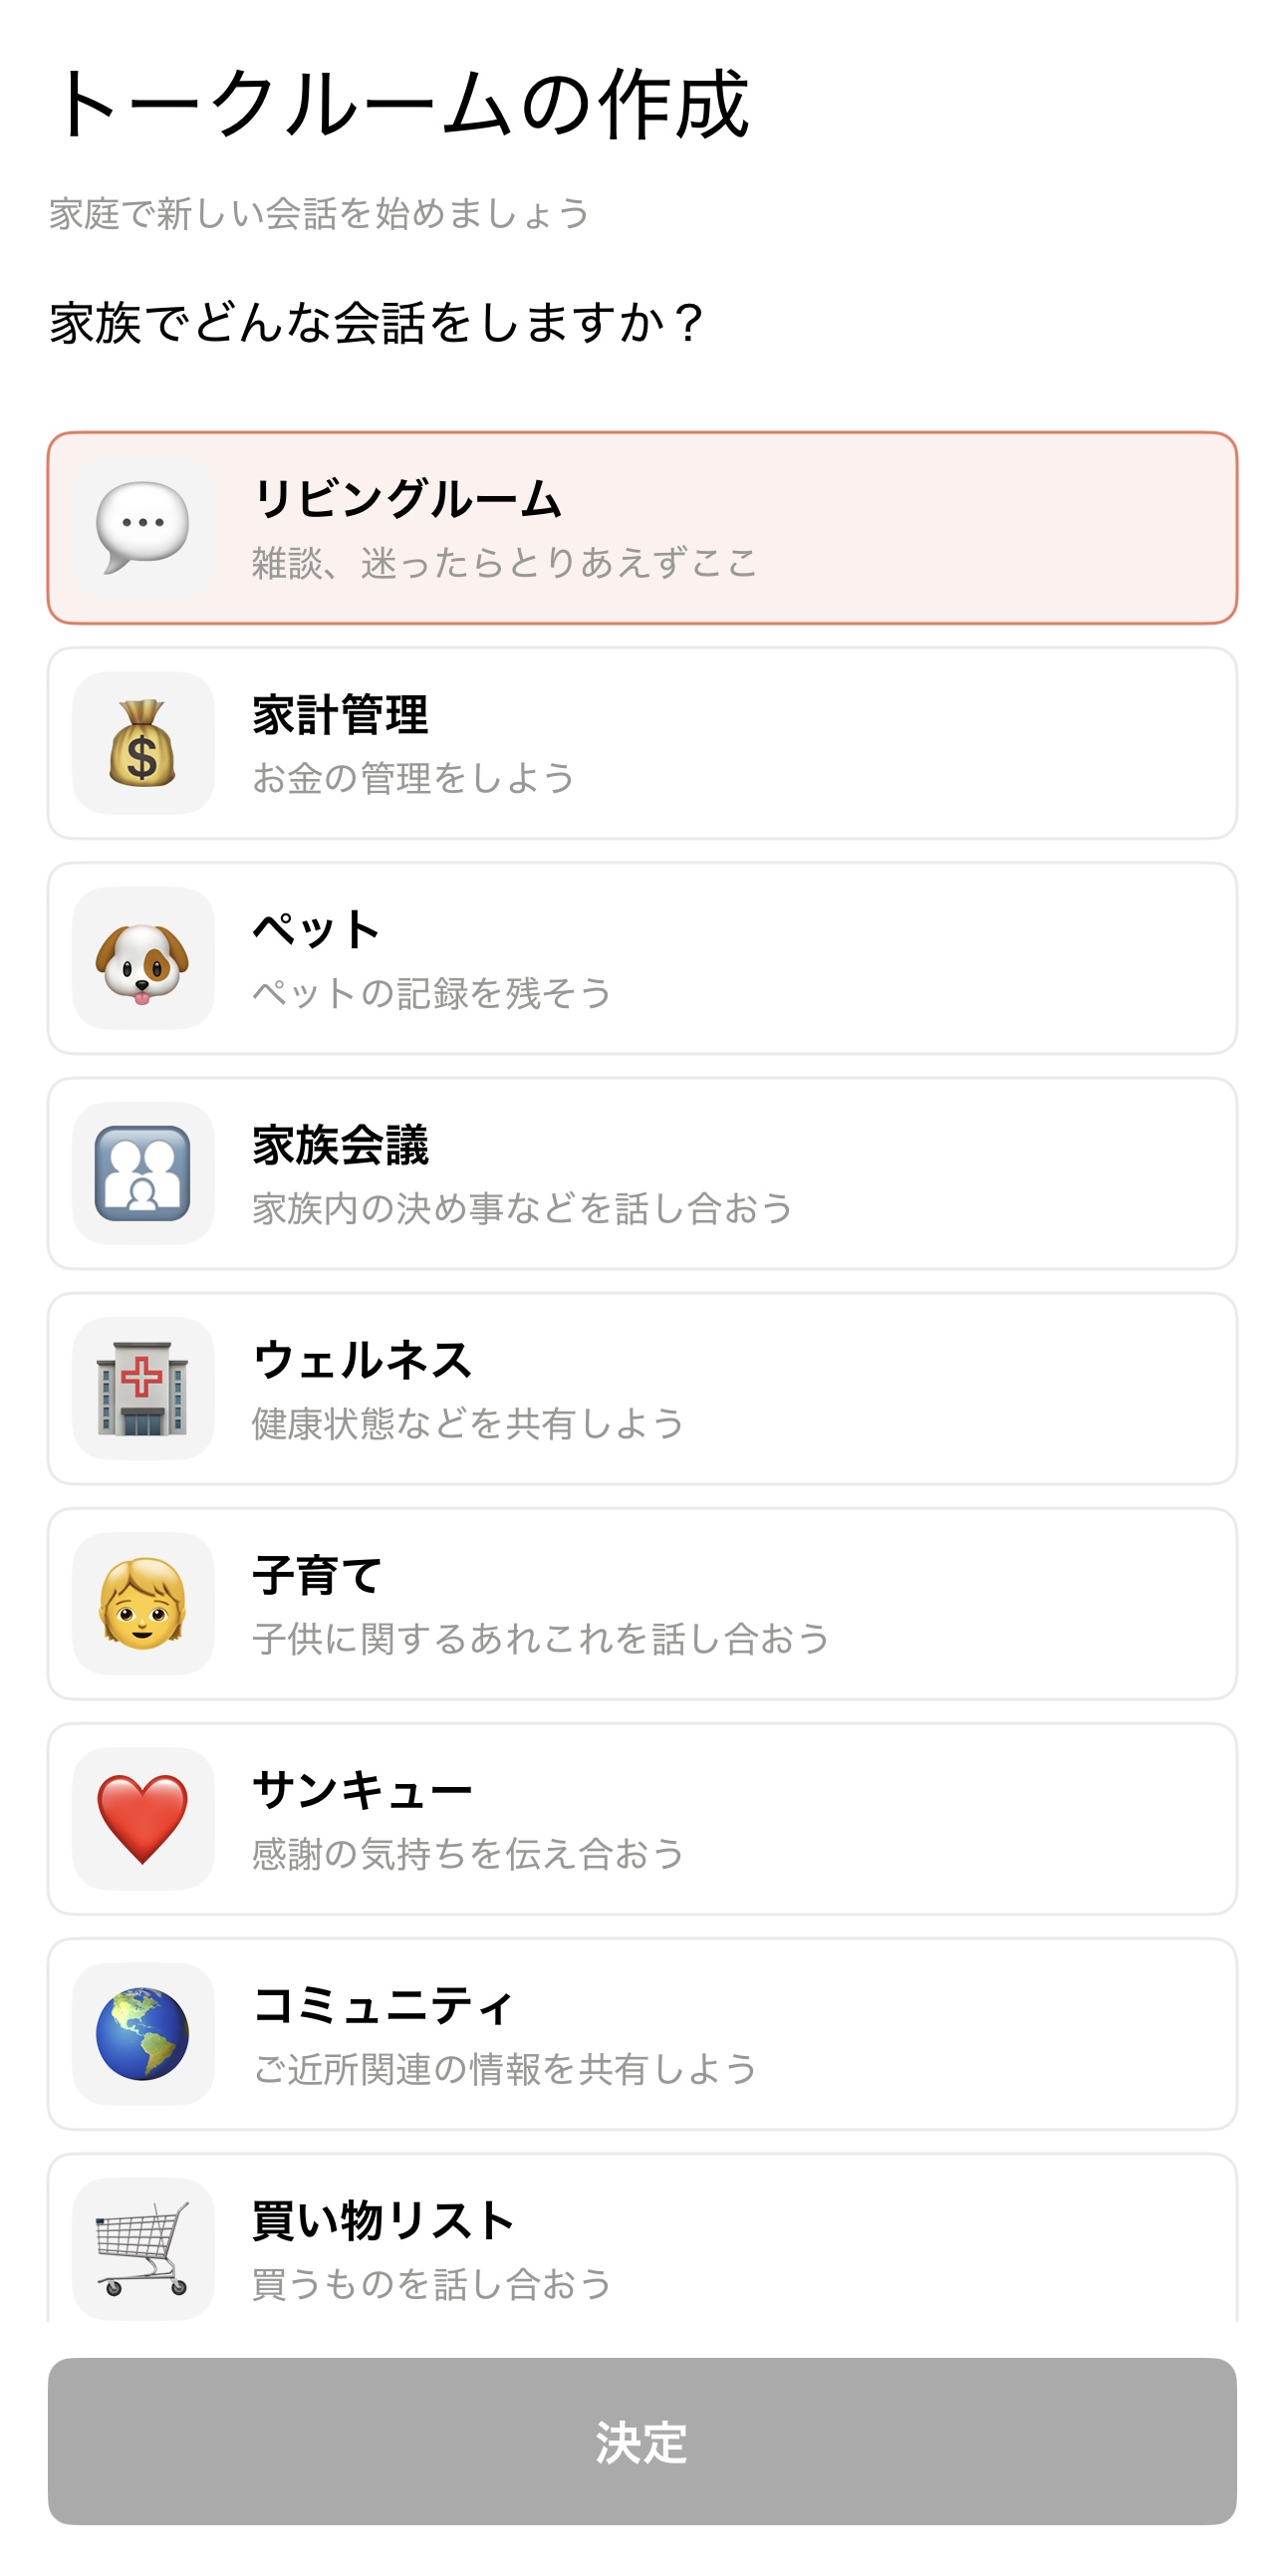
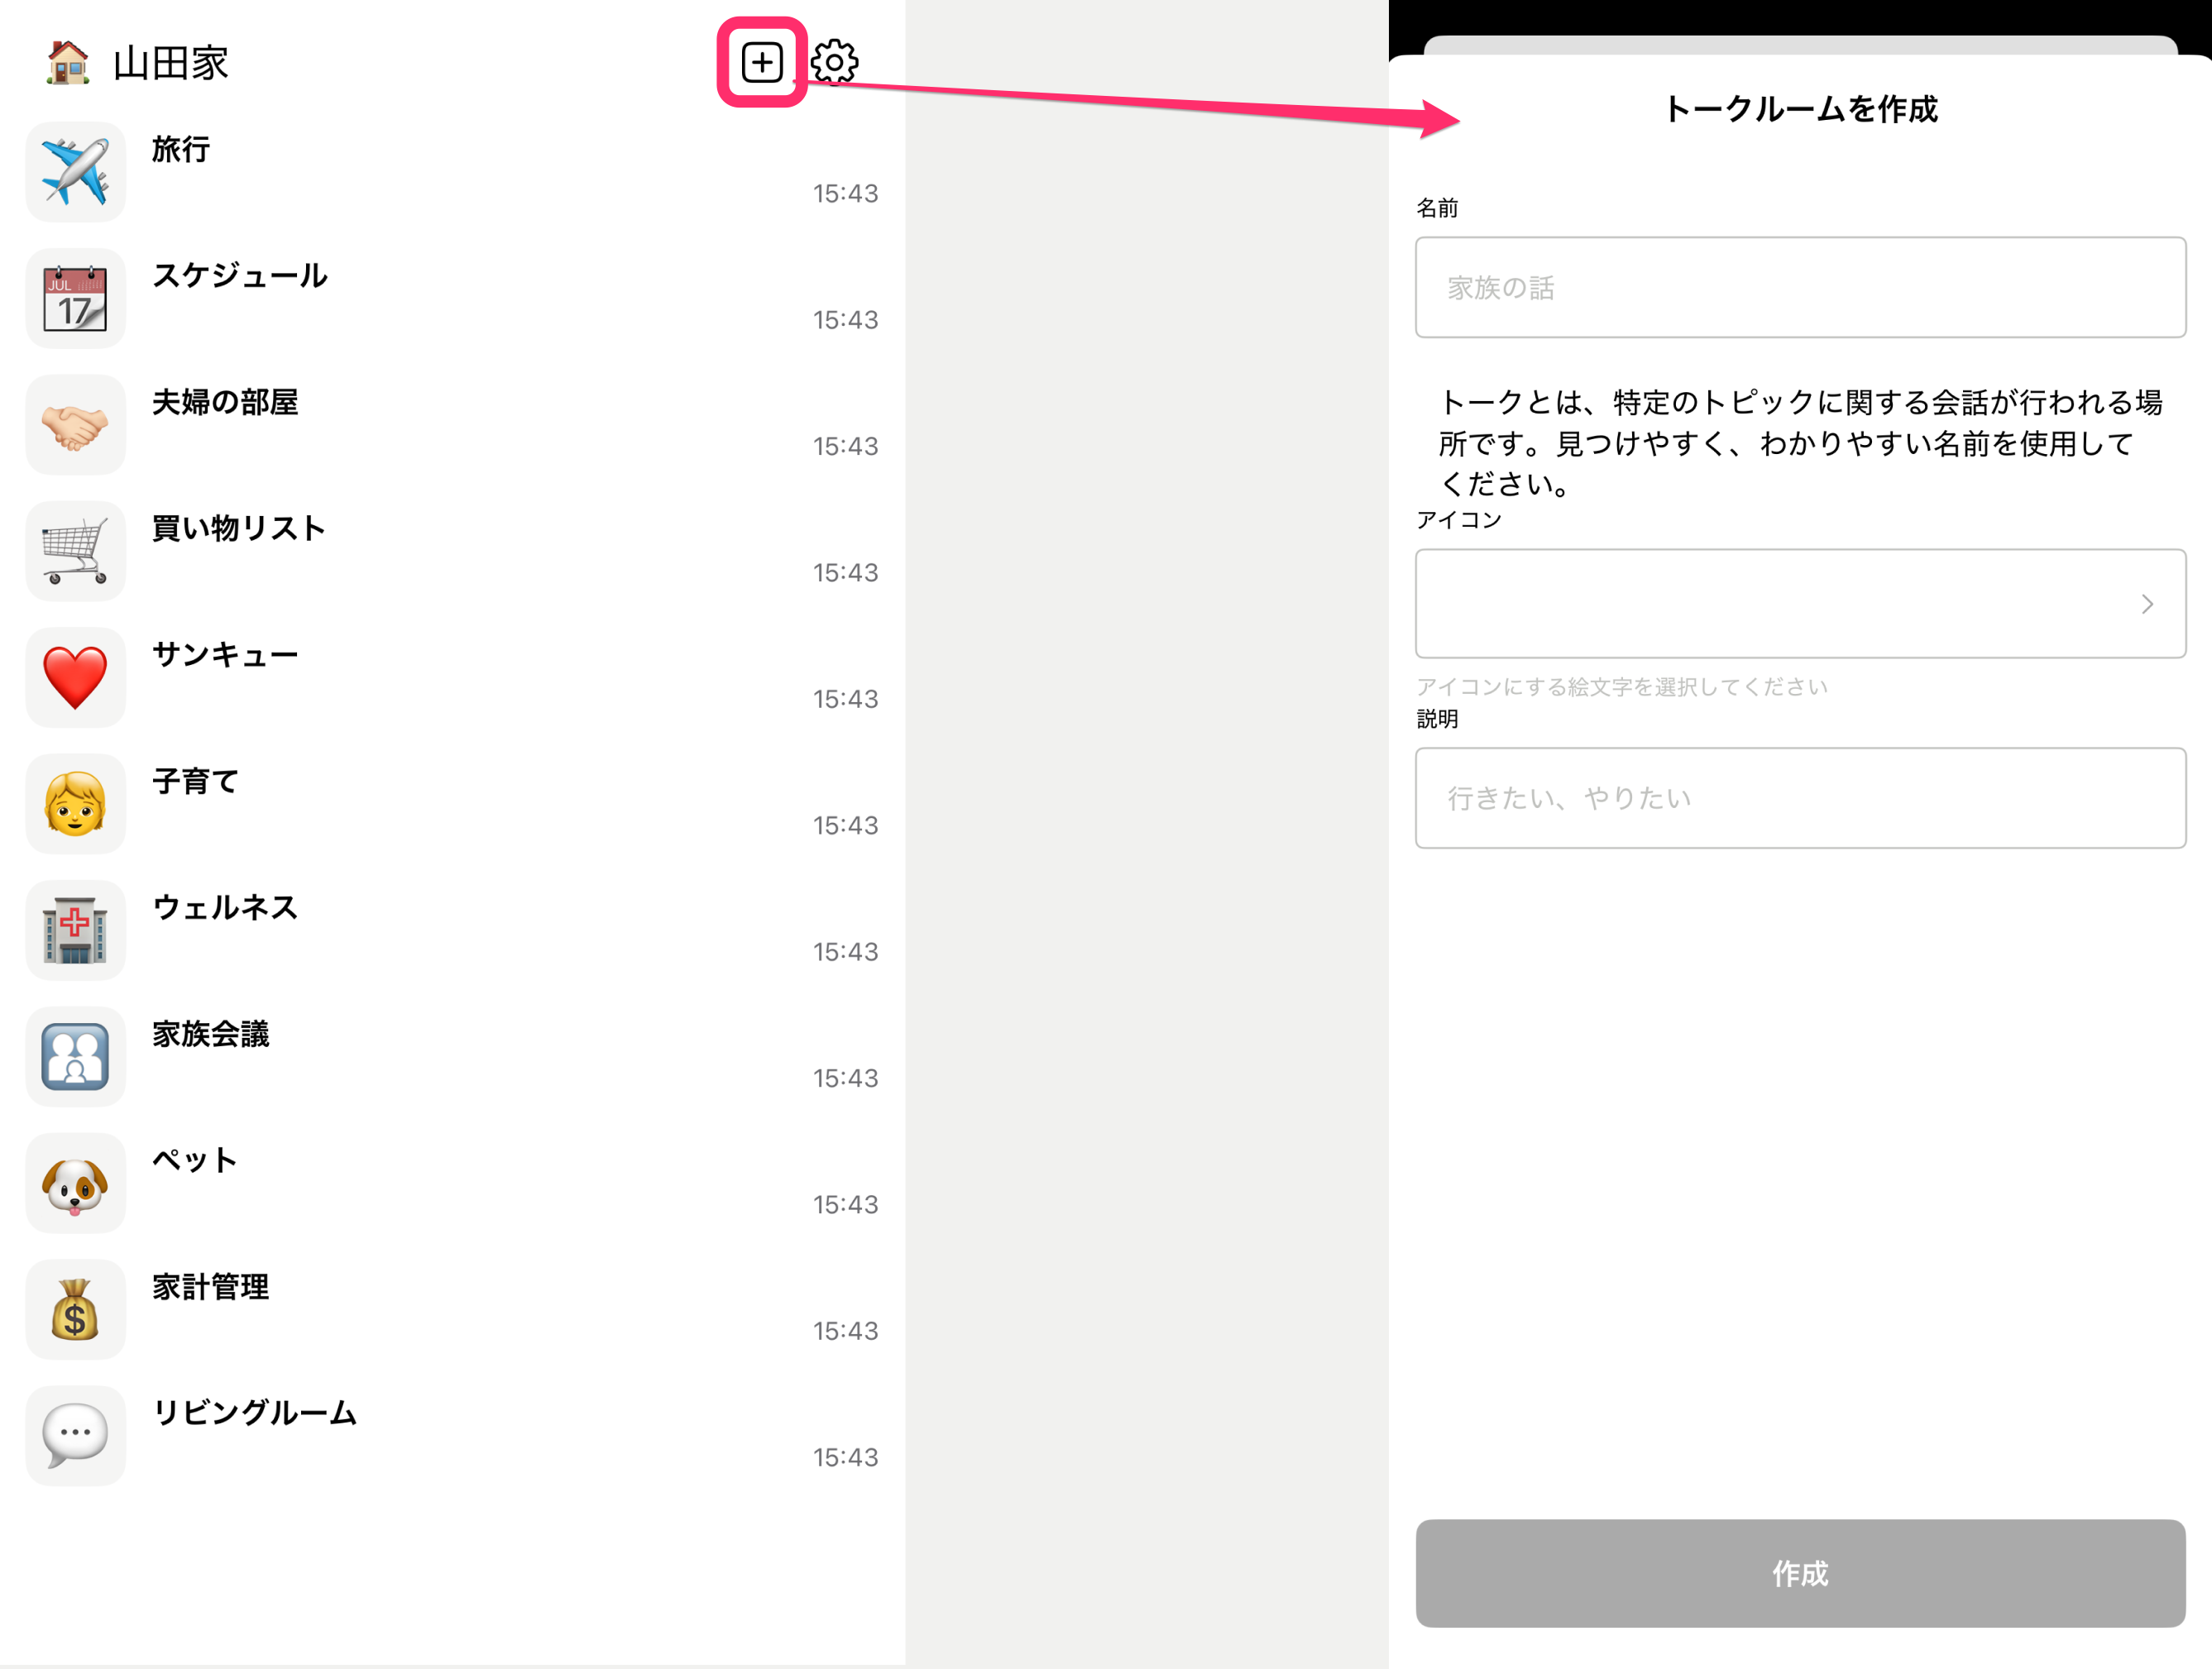
Create a Talk Room
Here you create your initial Talk Rooms.
Select from the Talk Rooms prepared in advance. You can add Talk Rooms later as well.
memStock's Talk Rooms let you separate conversations by topic, so messages don't get lost in the flow. Select the "Living Room" for family chit-chat, plus at least one more Talk Room.
Add members
Finally, add your family members.
You can also add family members after finishing the initial setup (Add family members). To add them later, skip this and your initial setup is complete.
Once you've invited your family members, the initial setup is done! Let's start using it right away!
Add family members
Add members to your family group. Only Admin users can add family members. Family users and Guests should ask an Admin user to add them.
You can add them after creating Talk Rooms during initial setup, or from [Family settings - Member list] > [Add member] on the settings screen.
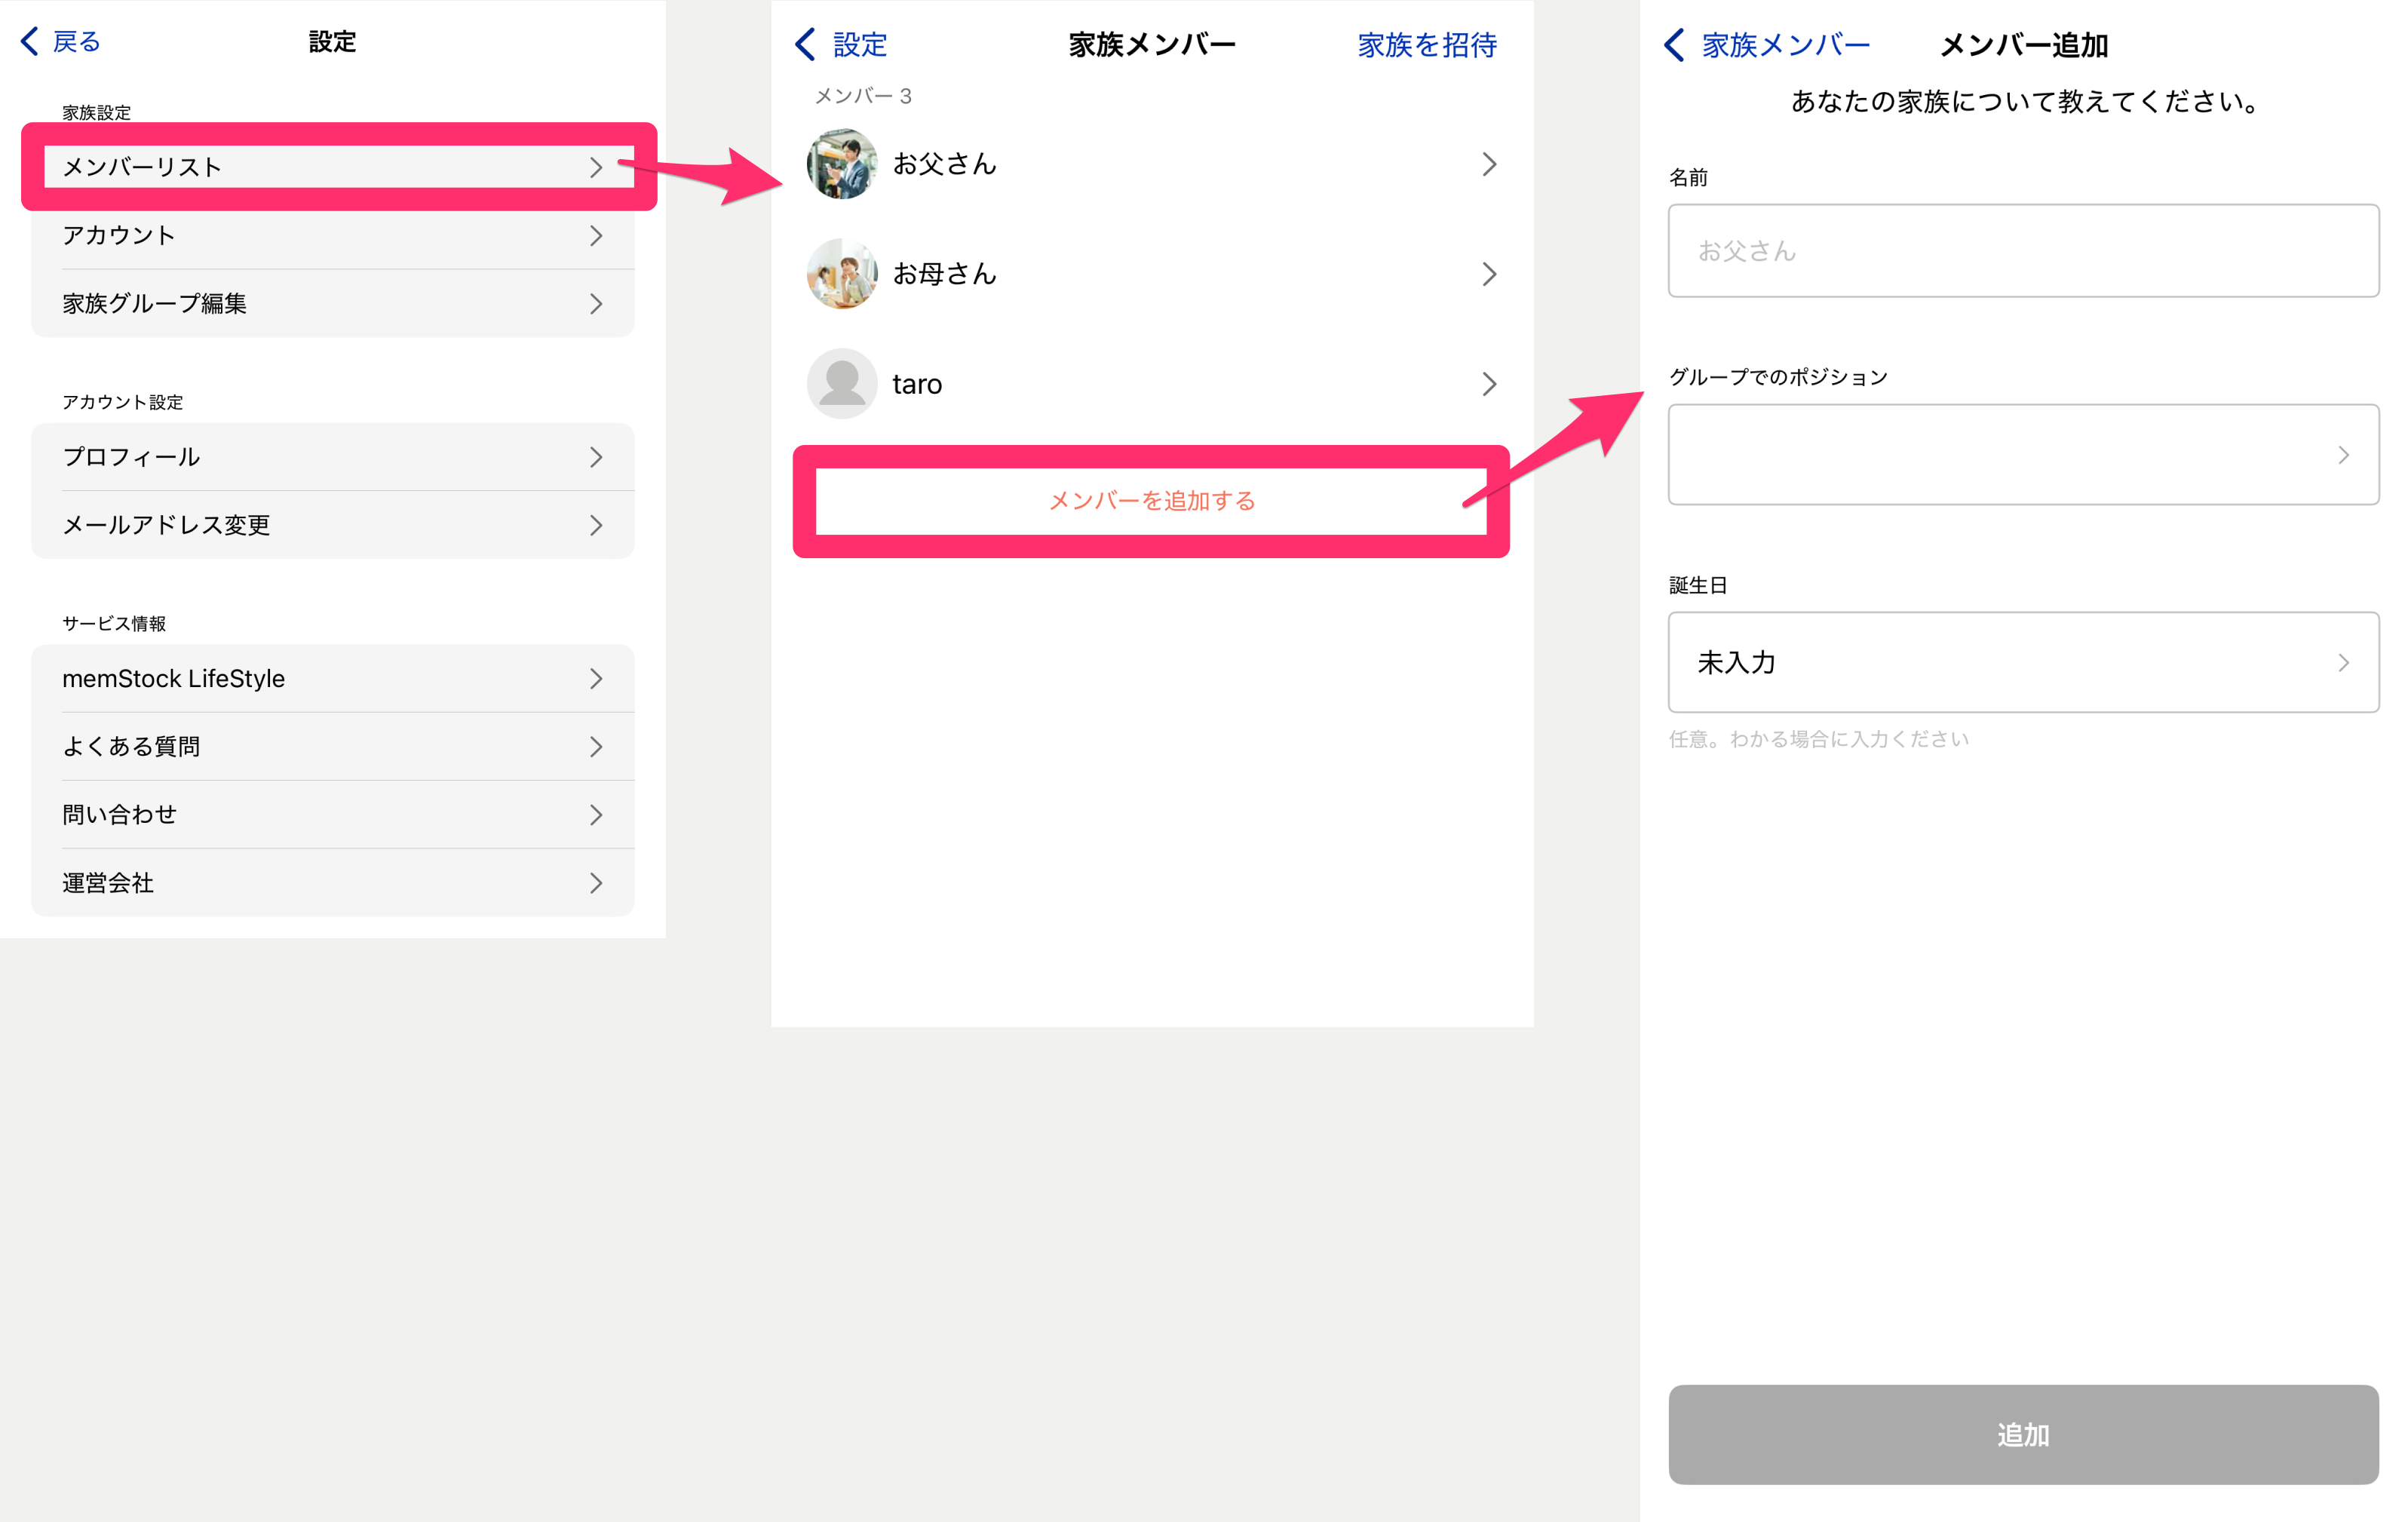
- Name The name of the member to add. The person being added can edit this later.
- Your relationship in the group Select the member's relationship (role) within the group. If there's no matching item, select Other.
- Date of birth Enter the member's date of birth. If you don't know it, you can proceed without selecting it. You can change it later, so it's fine to skip.
Invite your family
Invite the members you added. You can invite them from [Family settings - Member list] > [Invite family] on the settings screen.
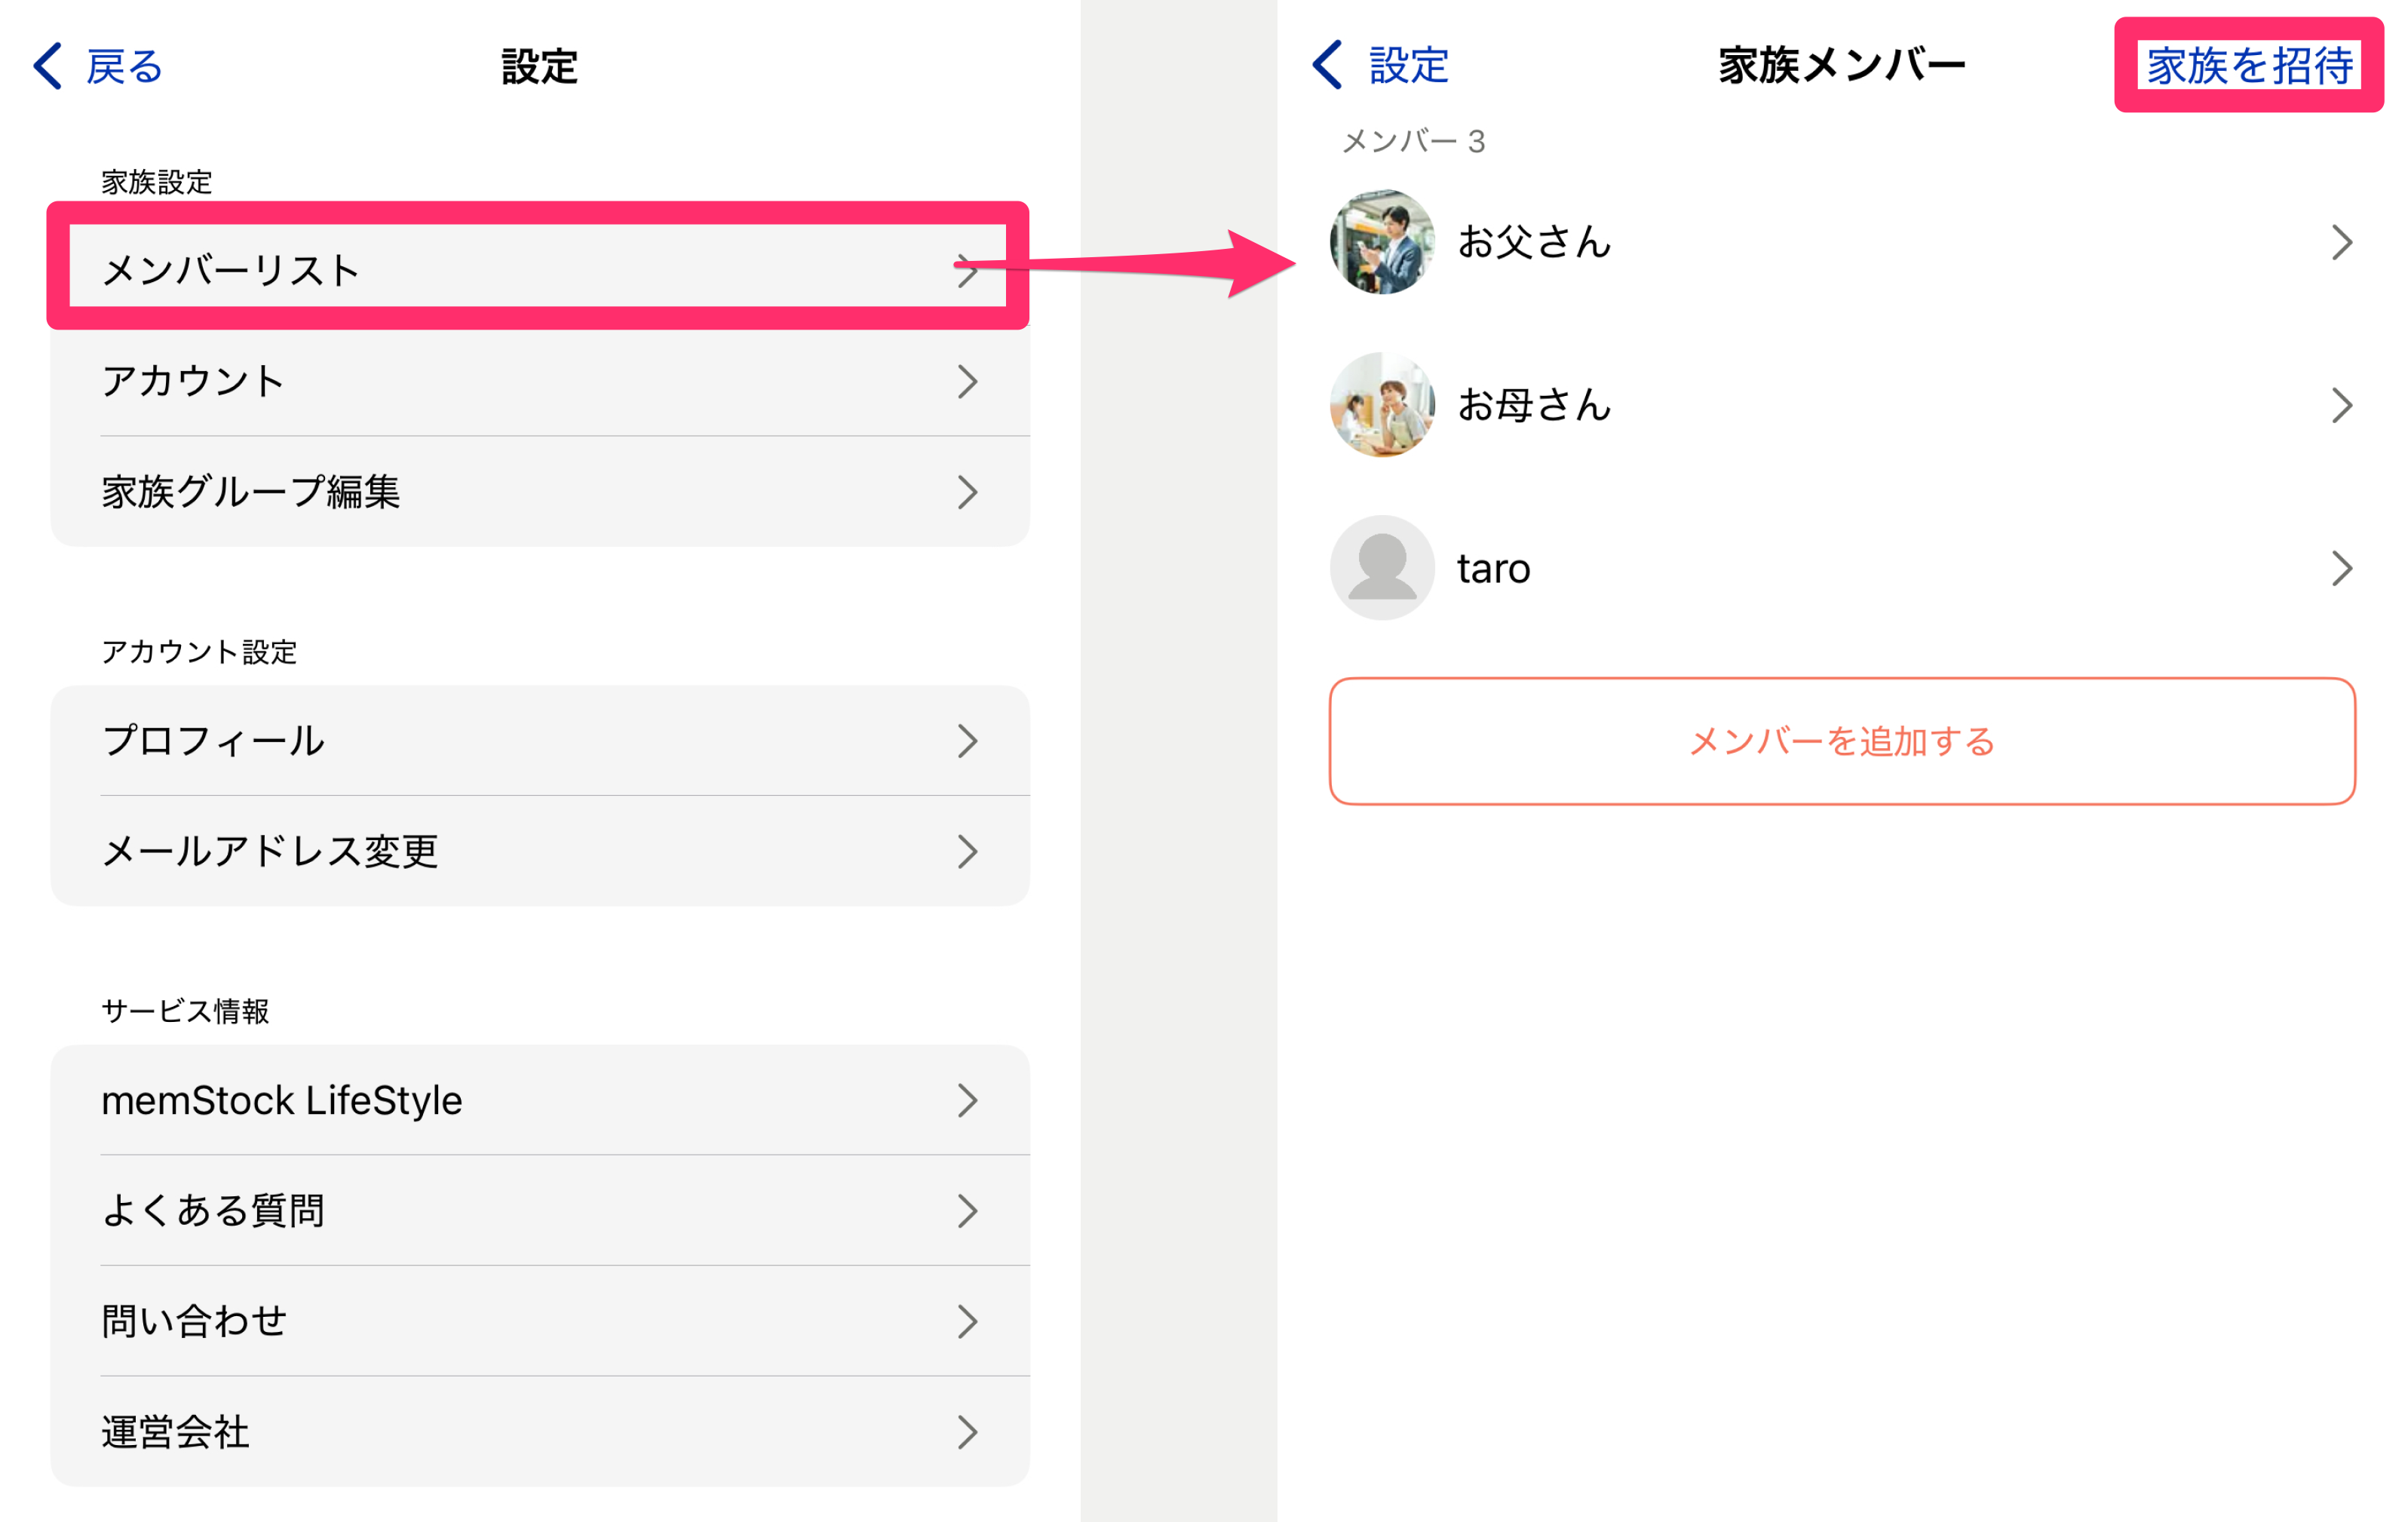
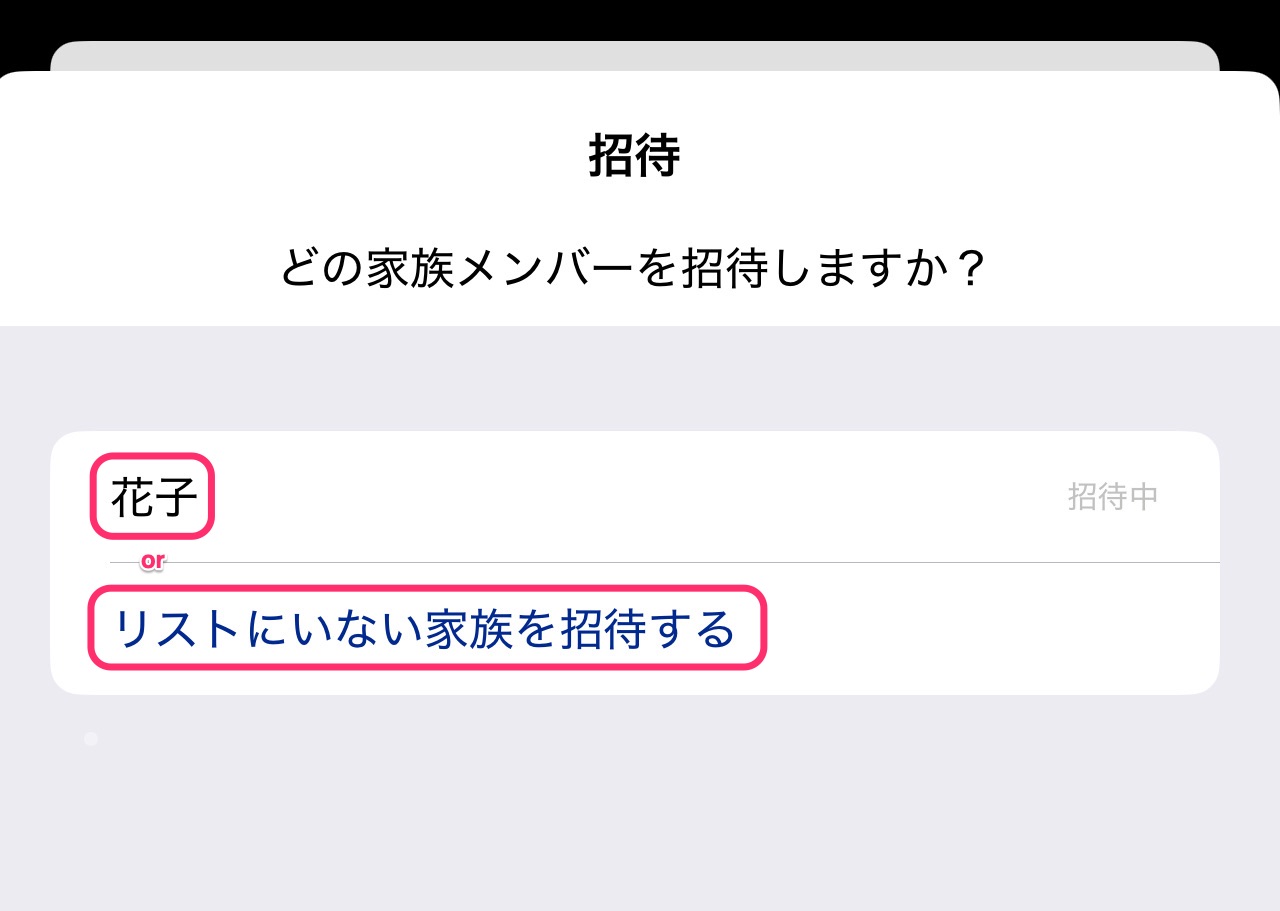
Choose the member you want to invite from the invitation screen, or if there are no members, add one using the [Invite a family member not on the list] button.
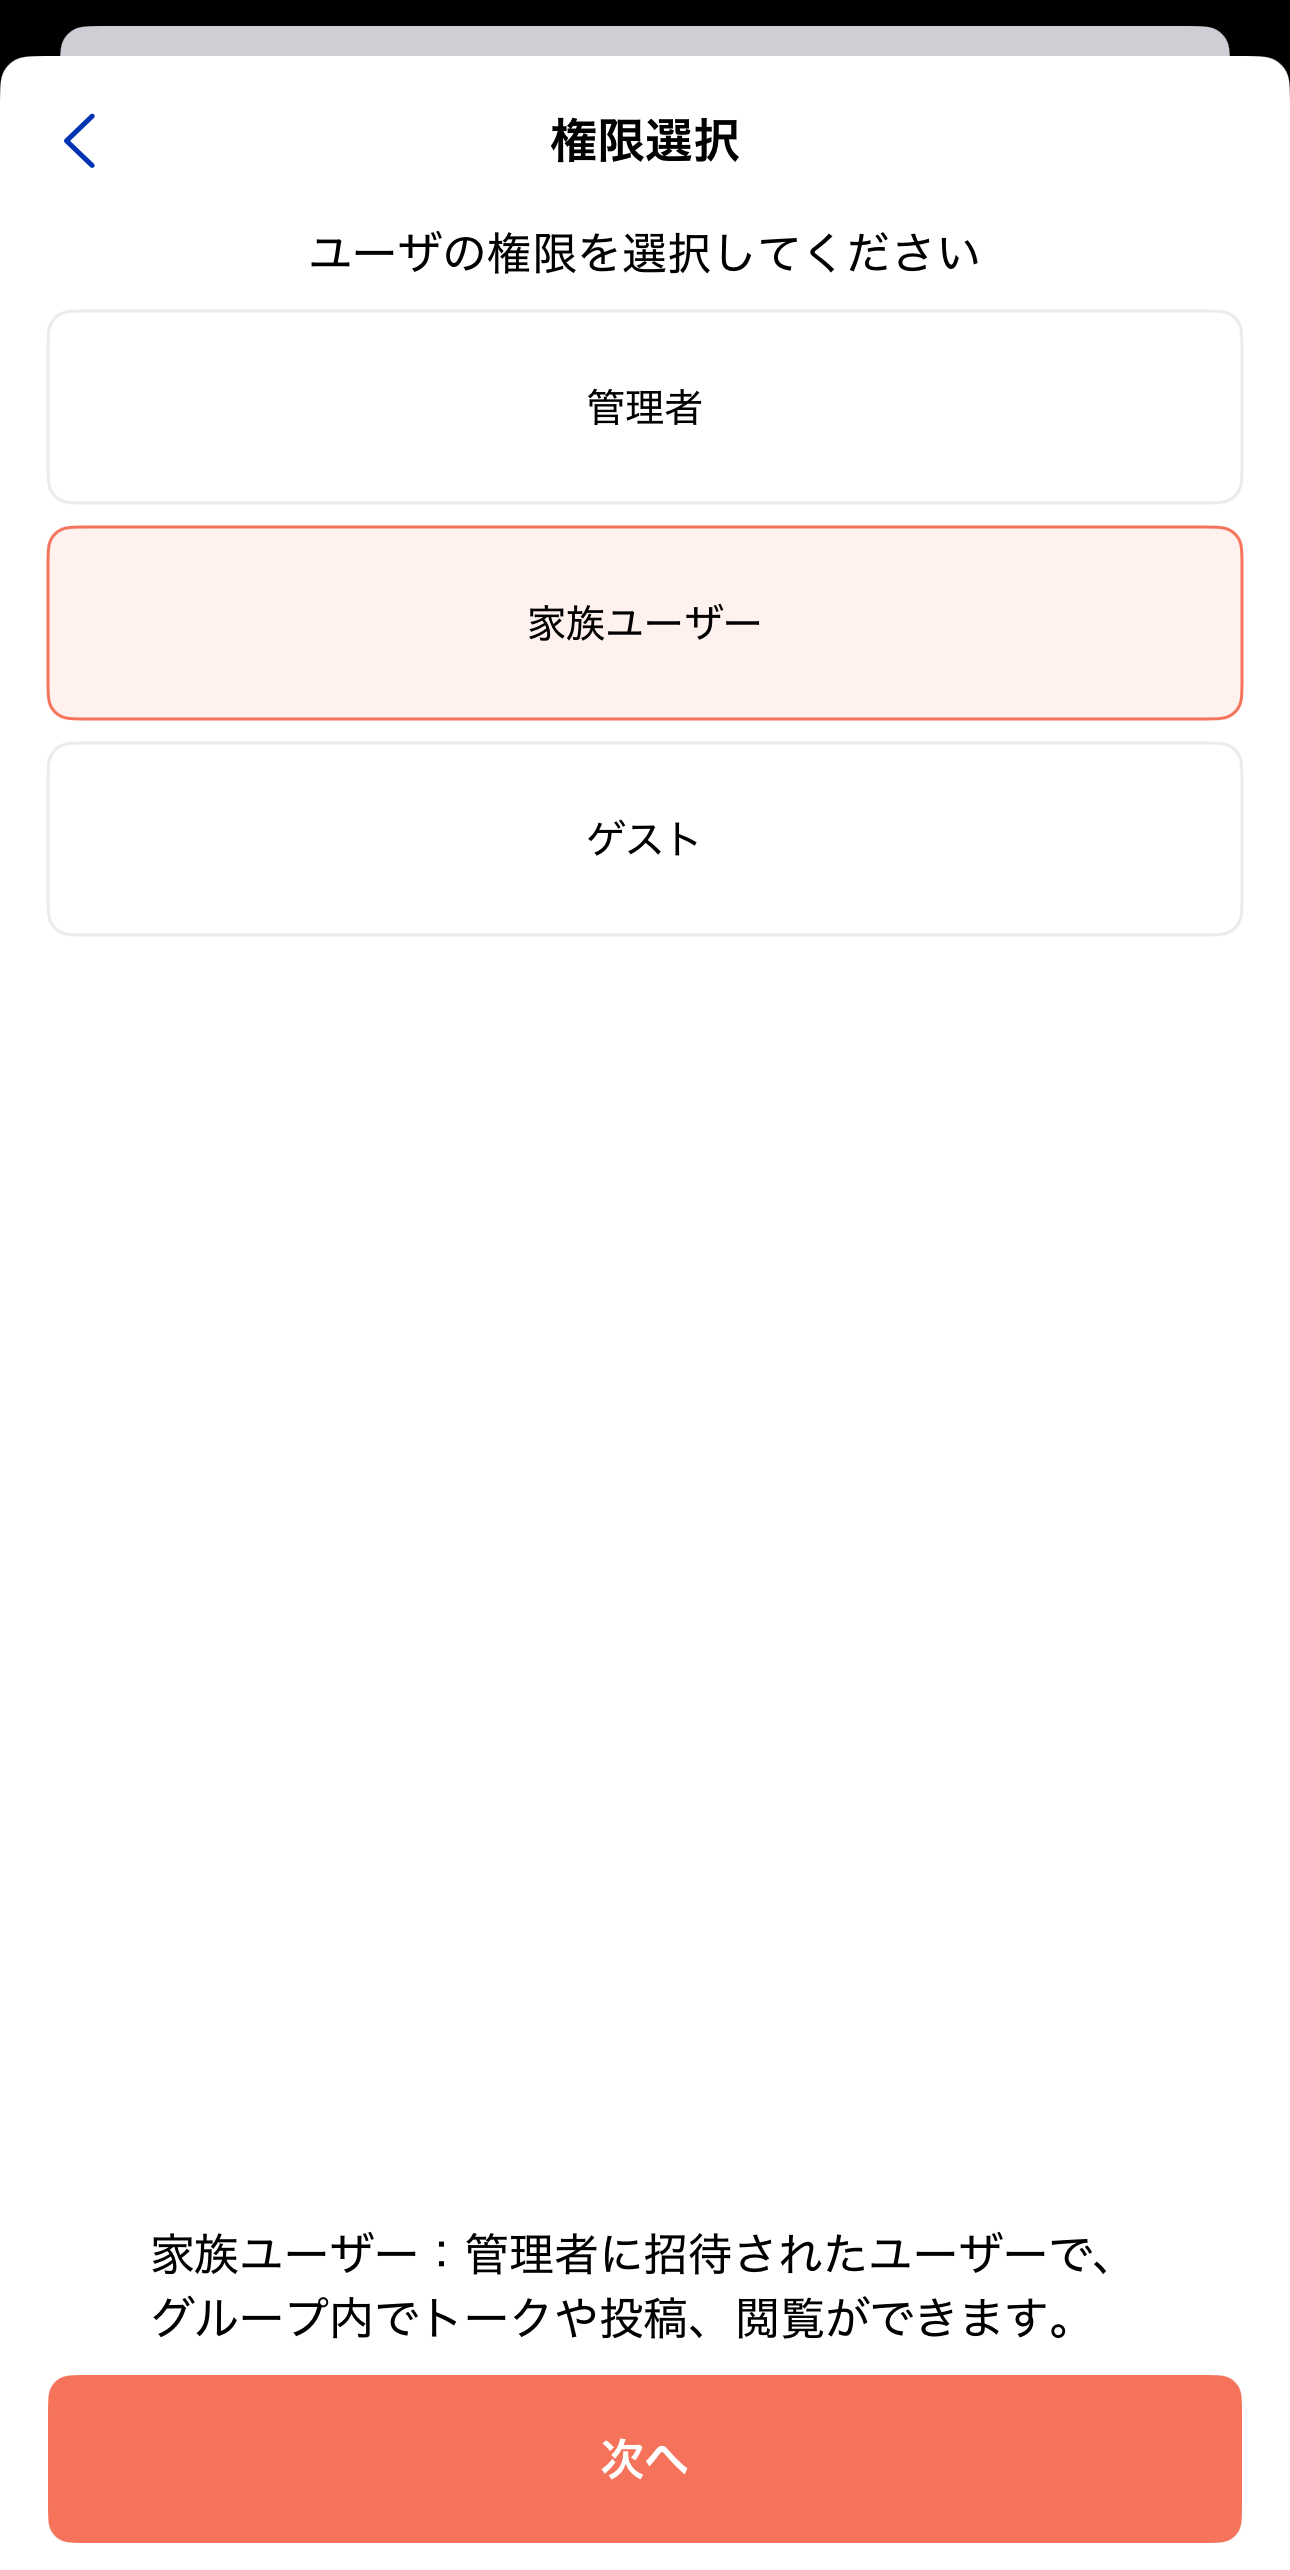
After selecting the member to invite, choose the user's permission on the next screen. See What's the difference between Admin, Family user, and Guest? for the differences.
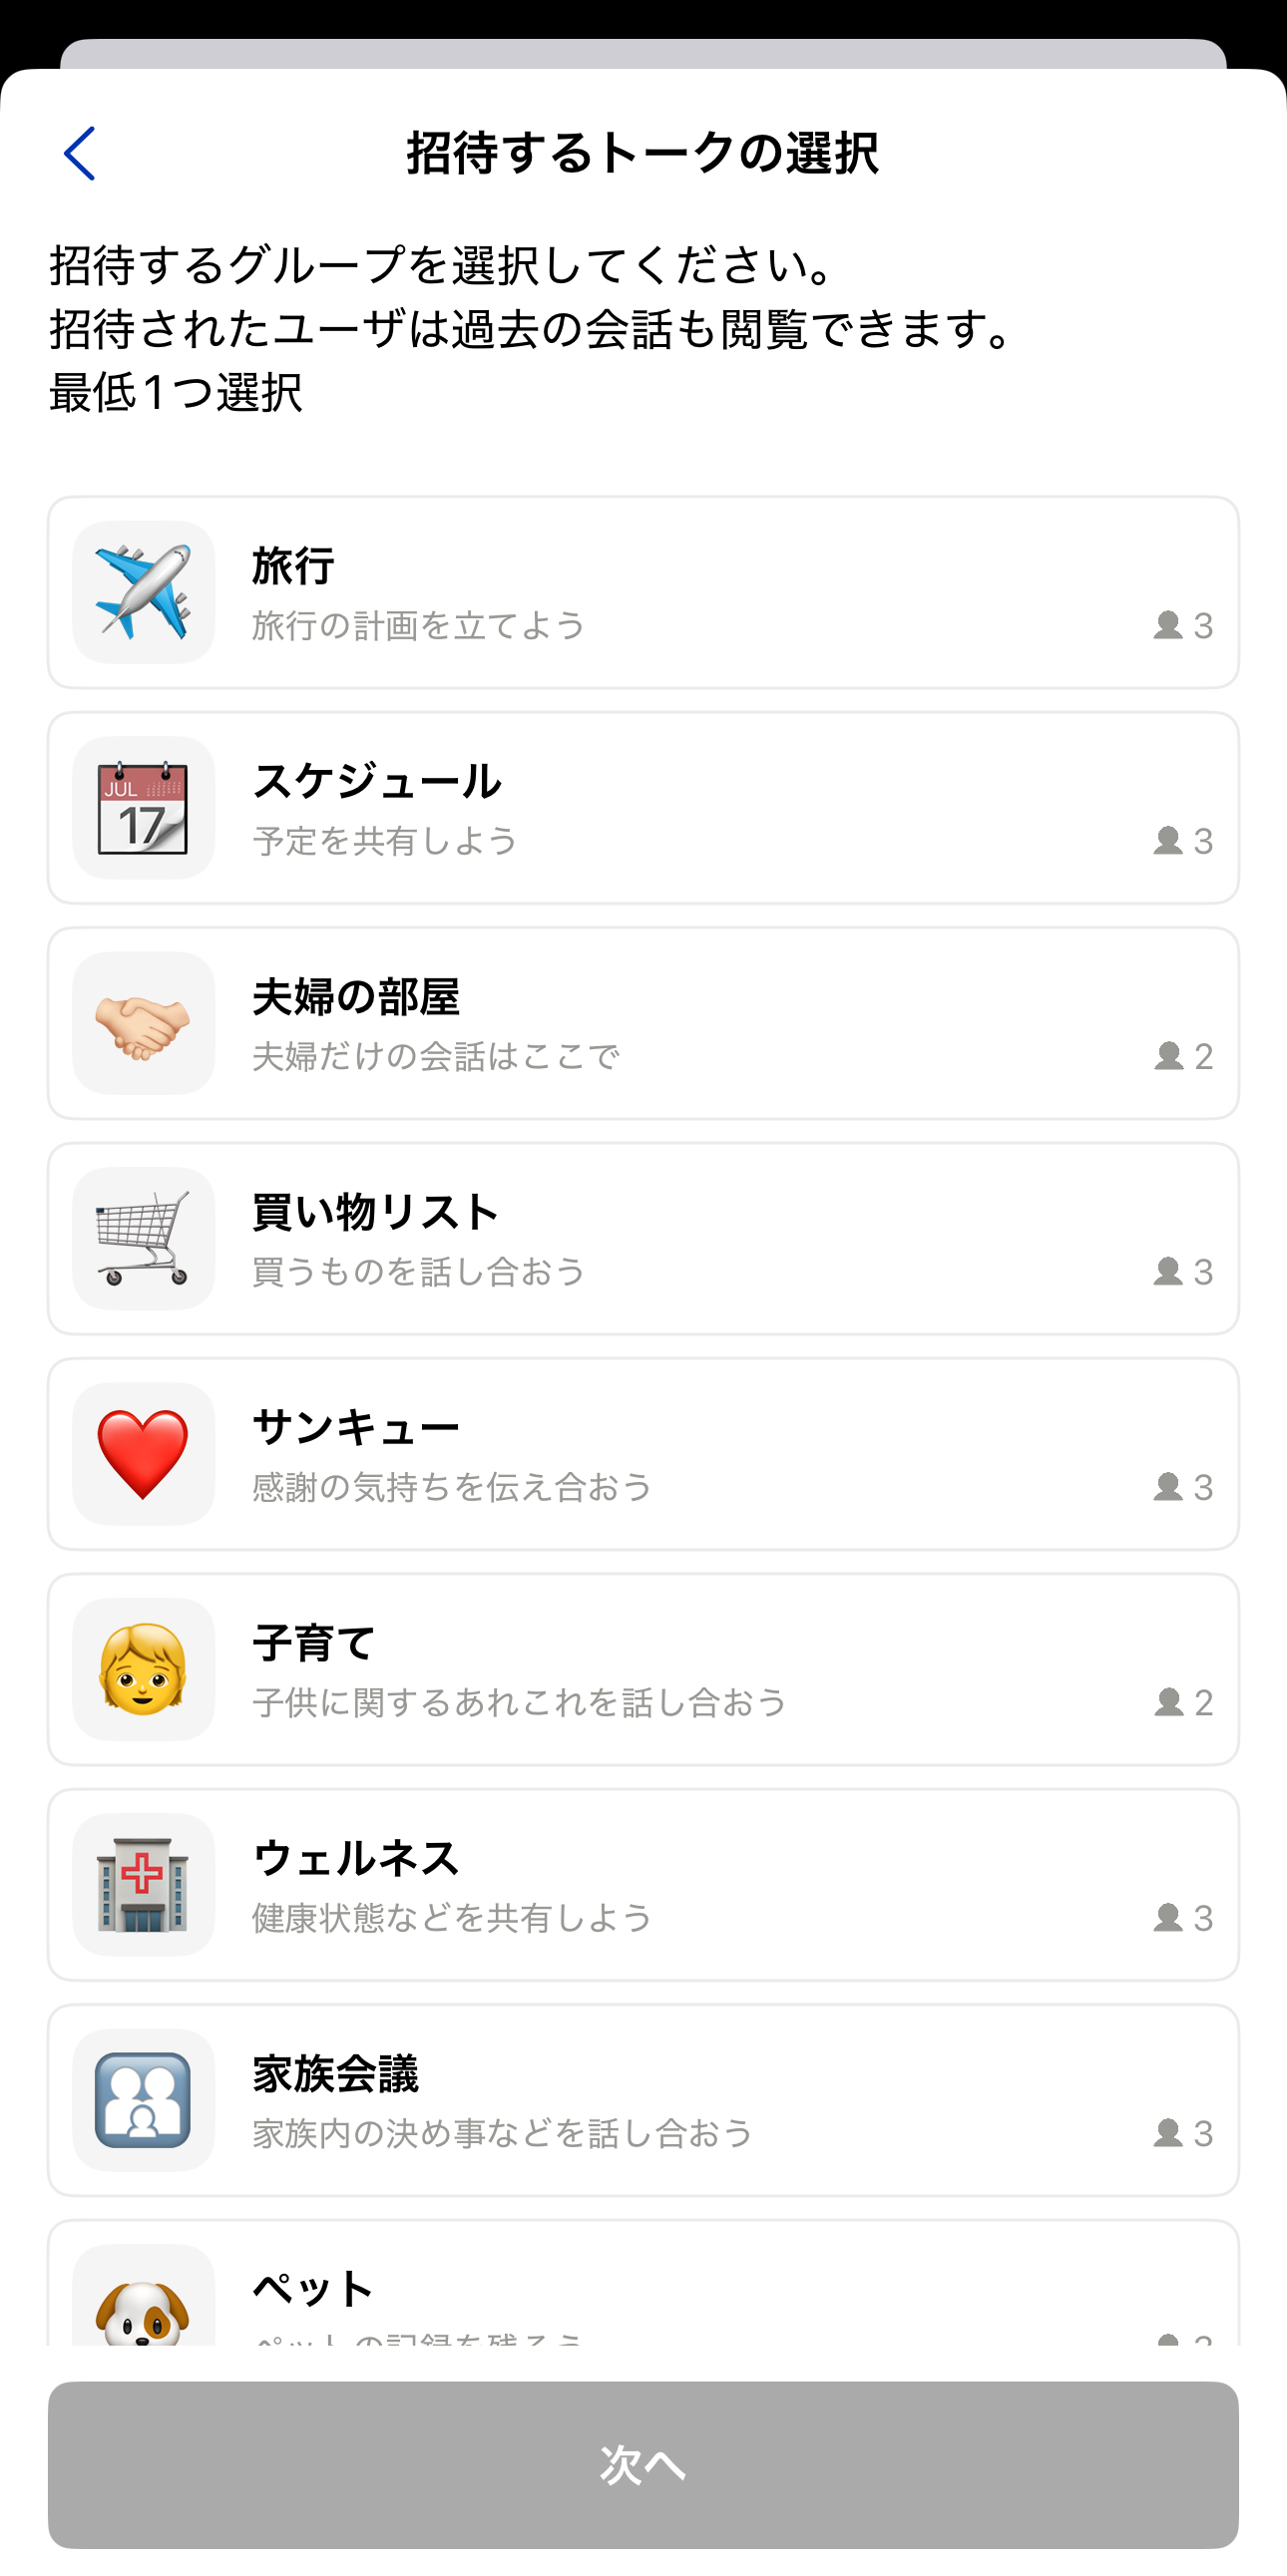
Next, select the Talk Rooms to invite them to. Choose the Talk Rooms you want the invited member to join (at least one).
*Note that members who join will also be able to see the Talk history from before they joined.
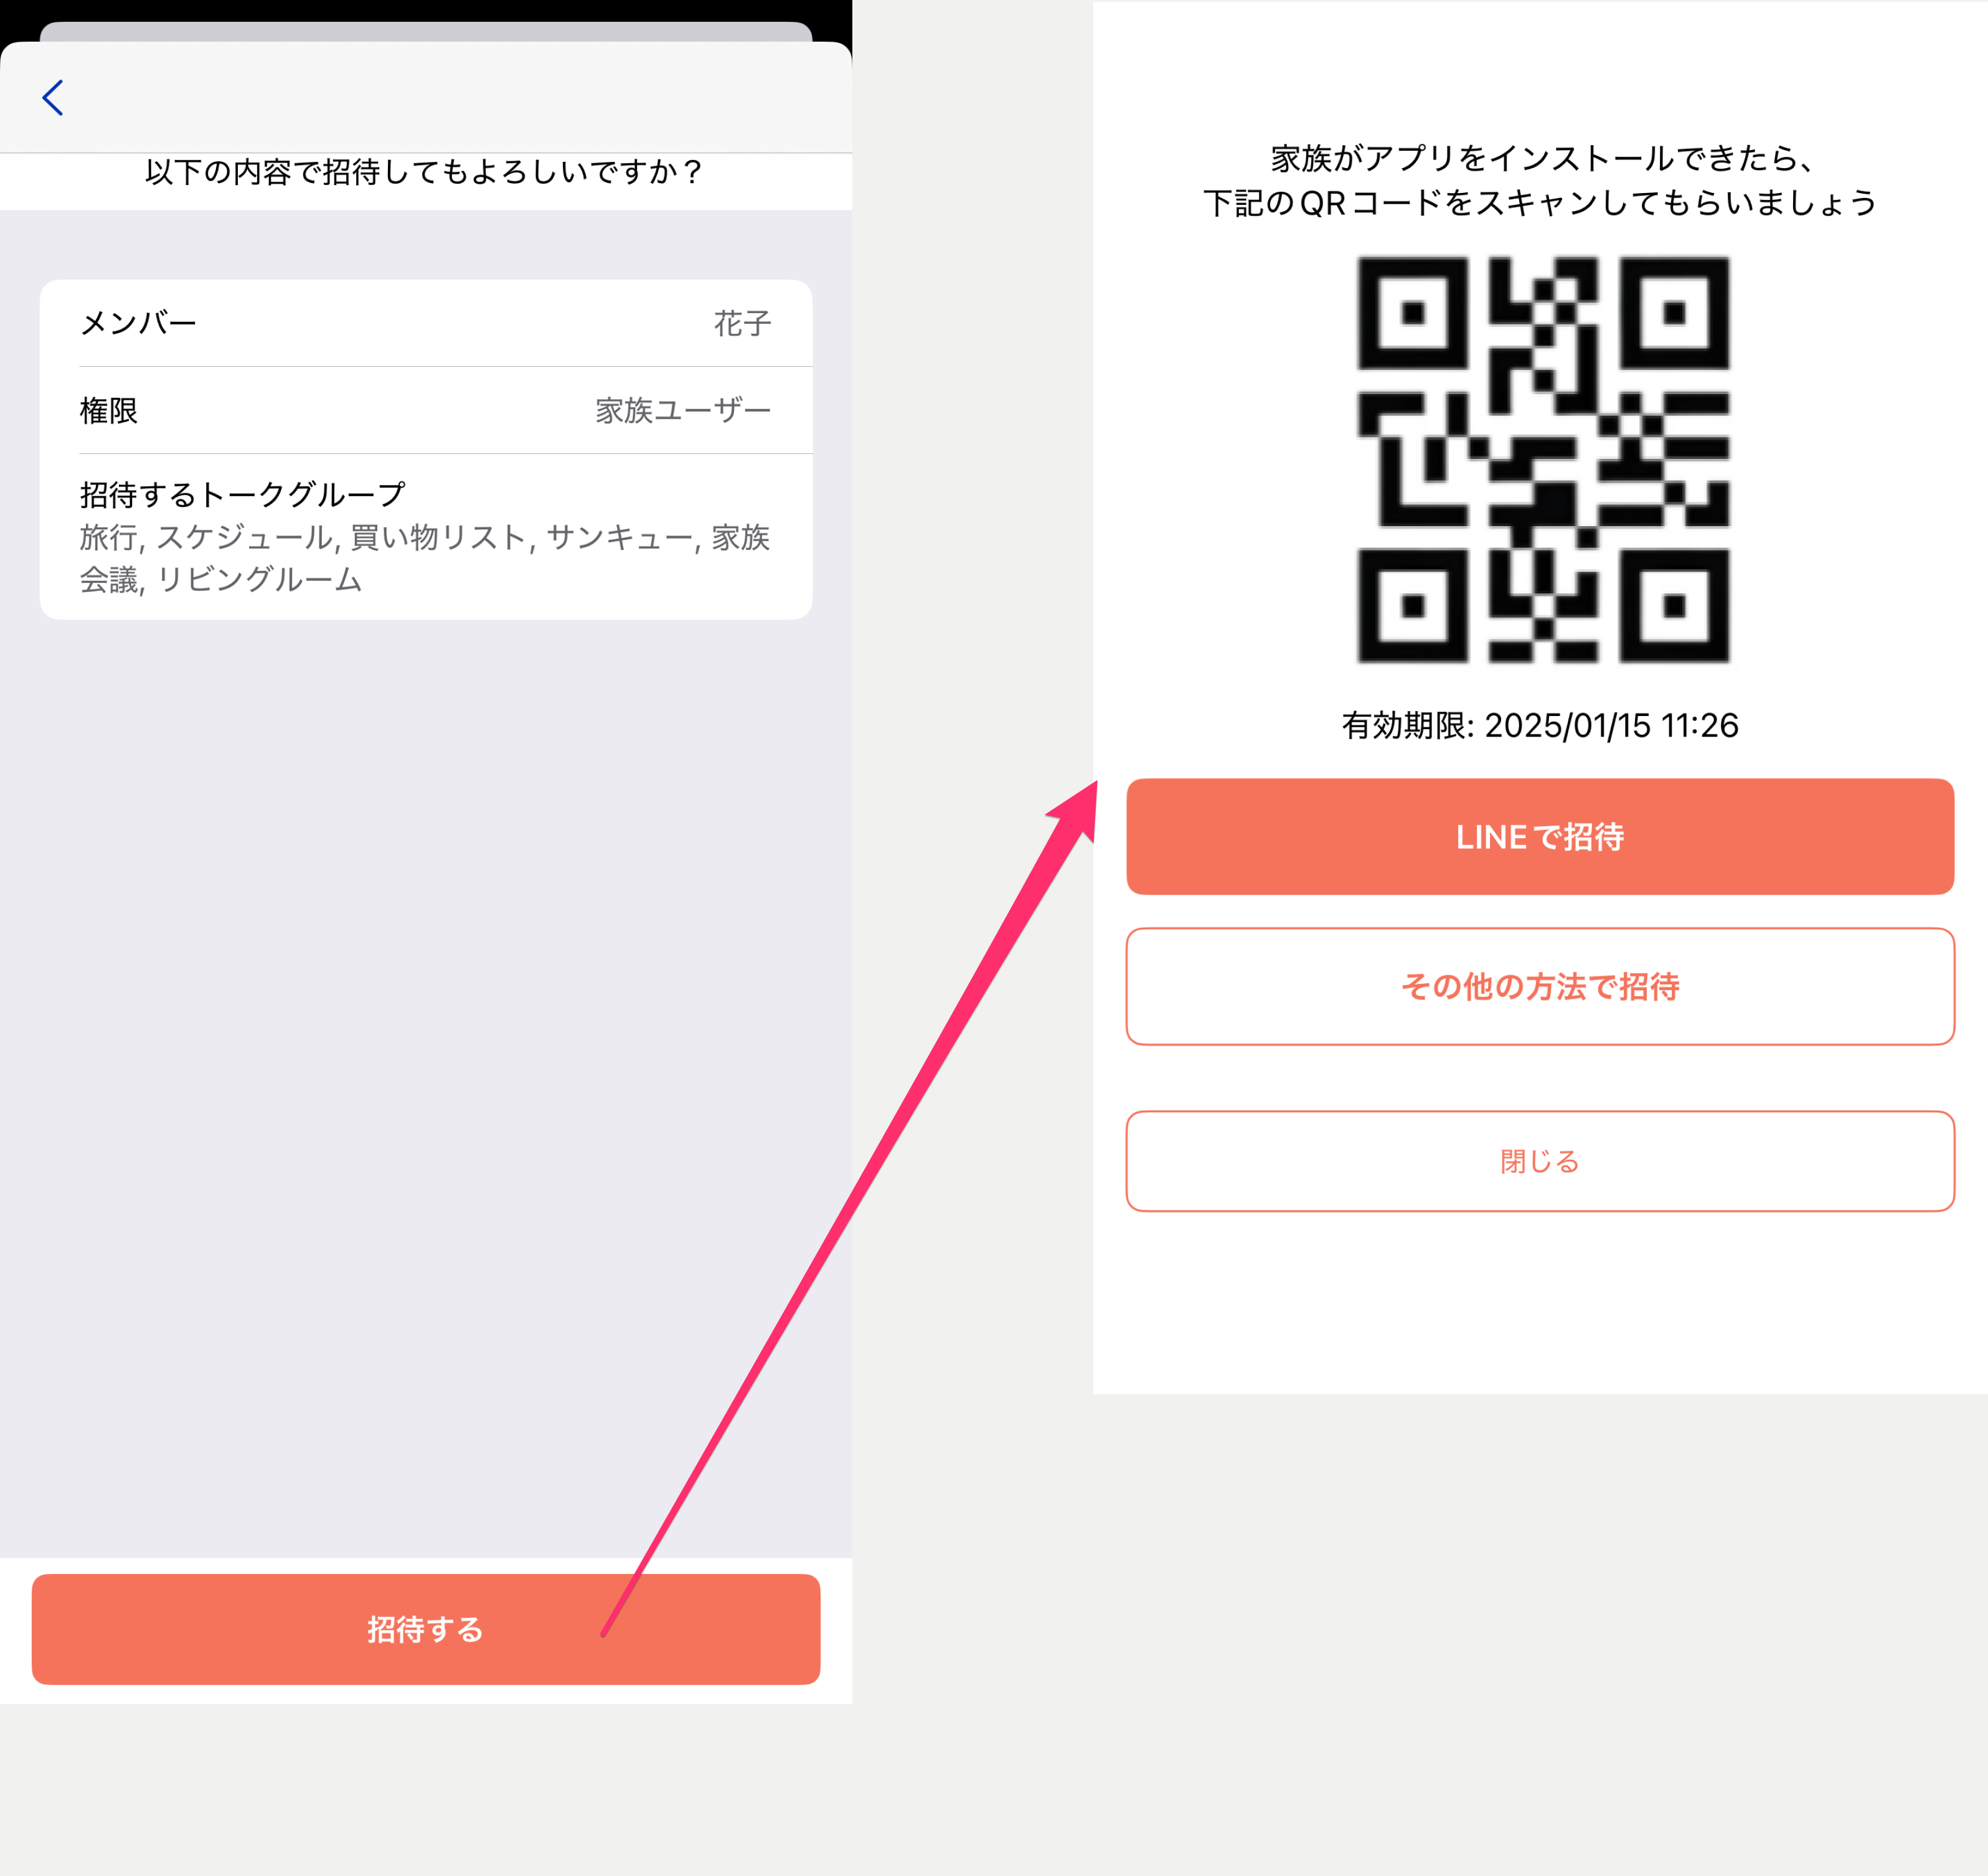
Finally, review the details and press the [Invite] button to display a QR code. Have the person you're inviting scan it, or use the share button to share it via a service like LINE.
*Invitations are valid for 24 hours. If it expires, invite them again.
Create a Talk Room
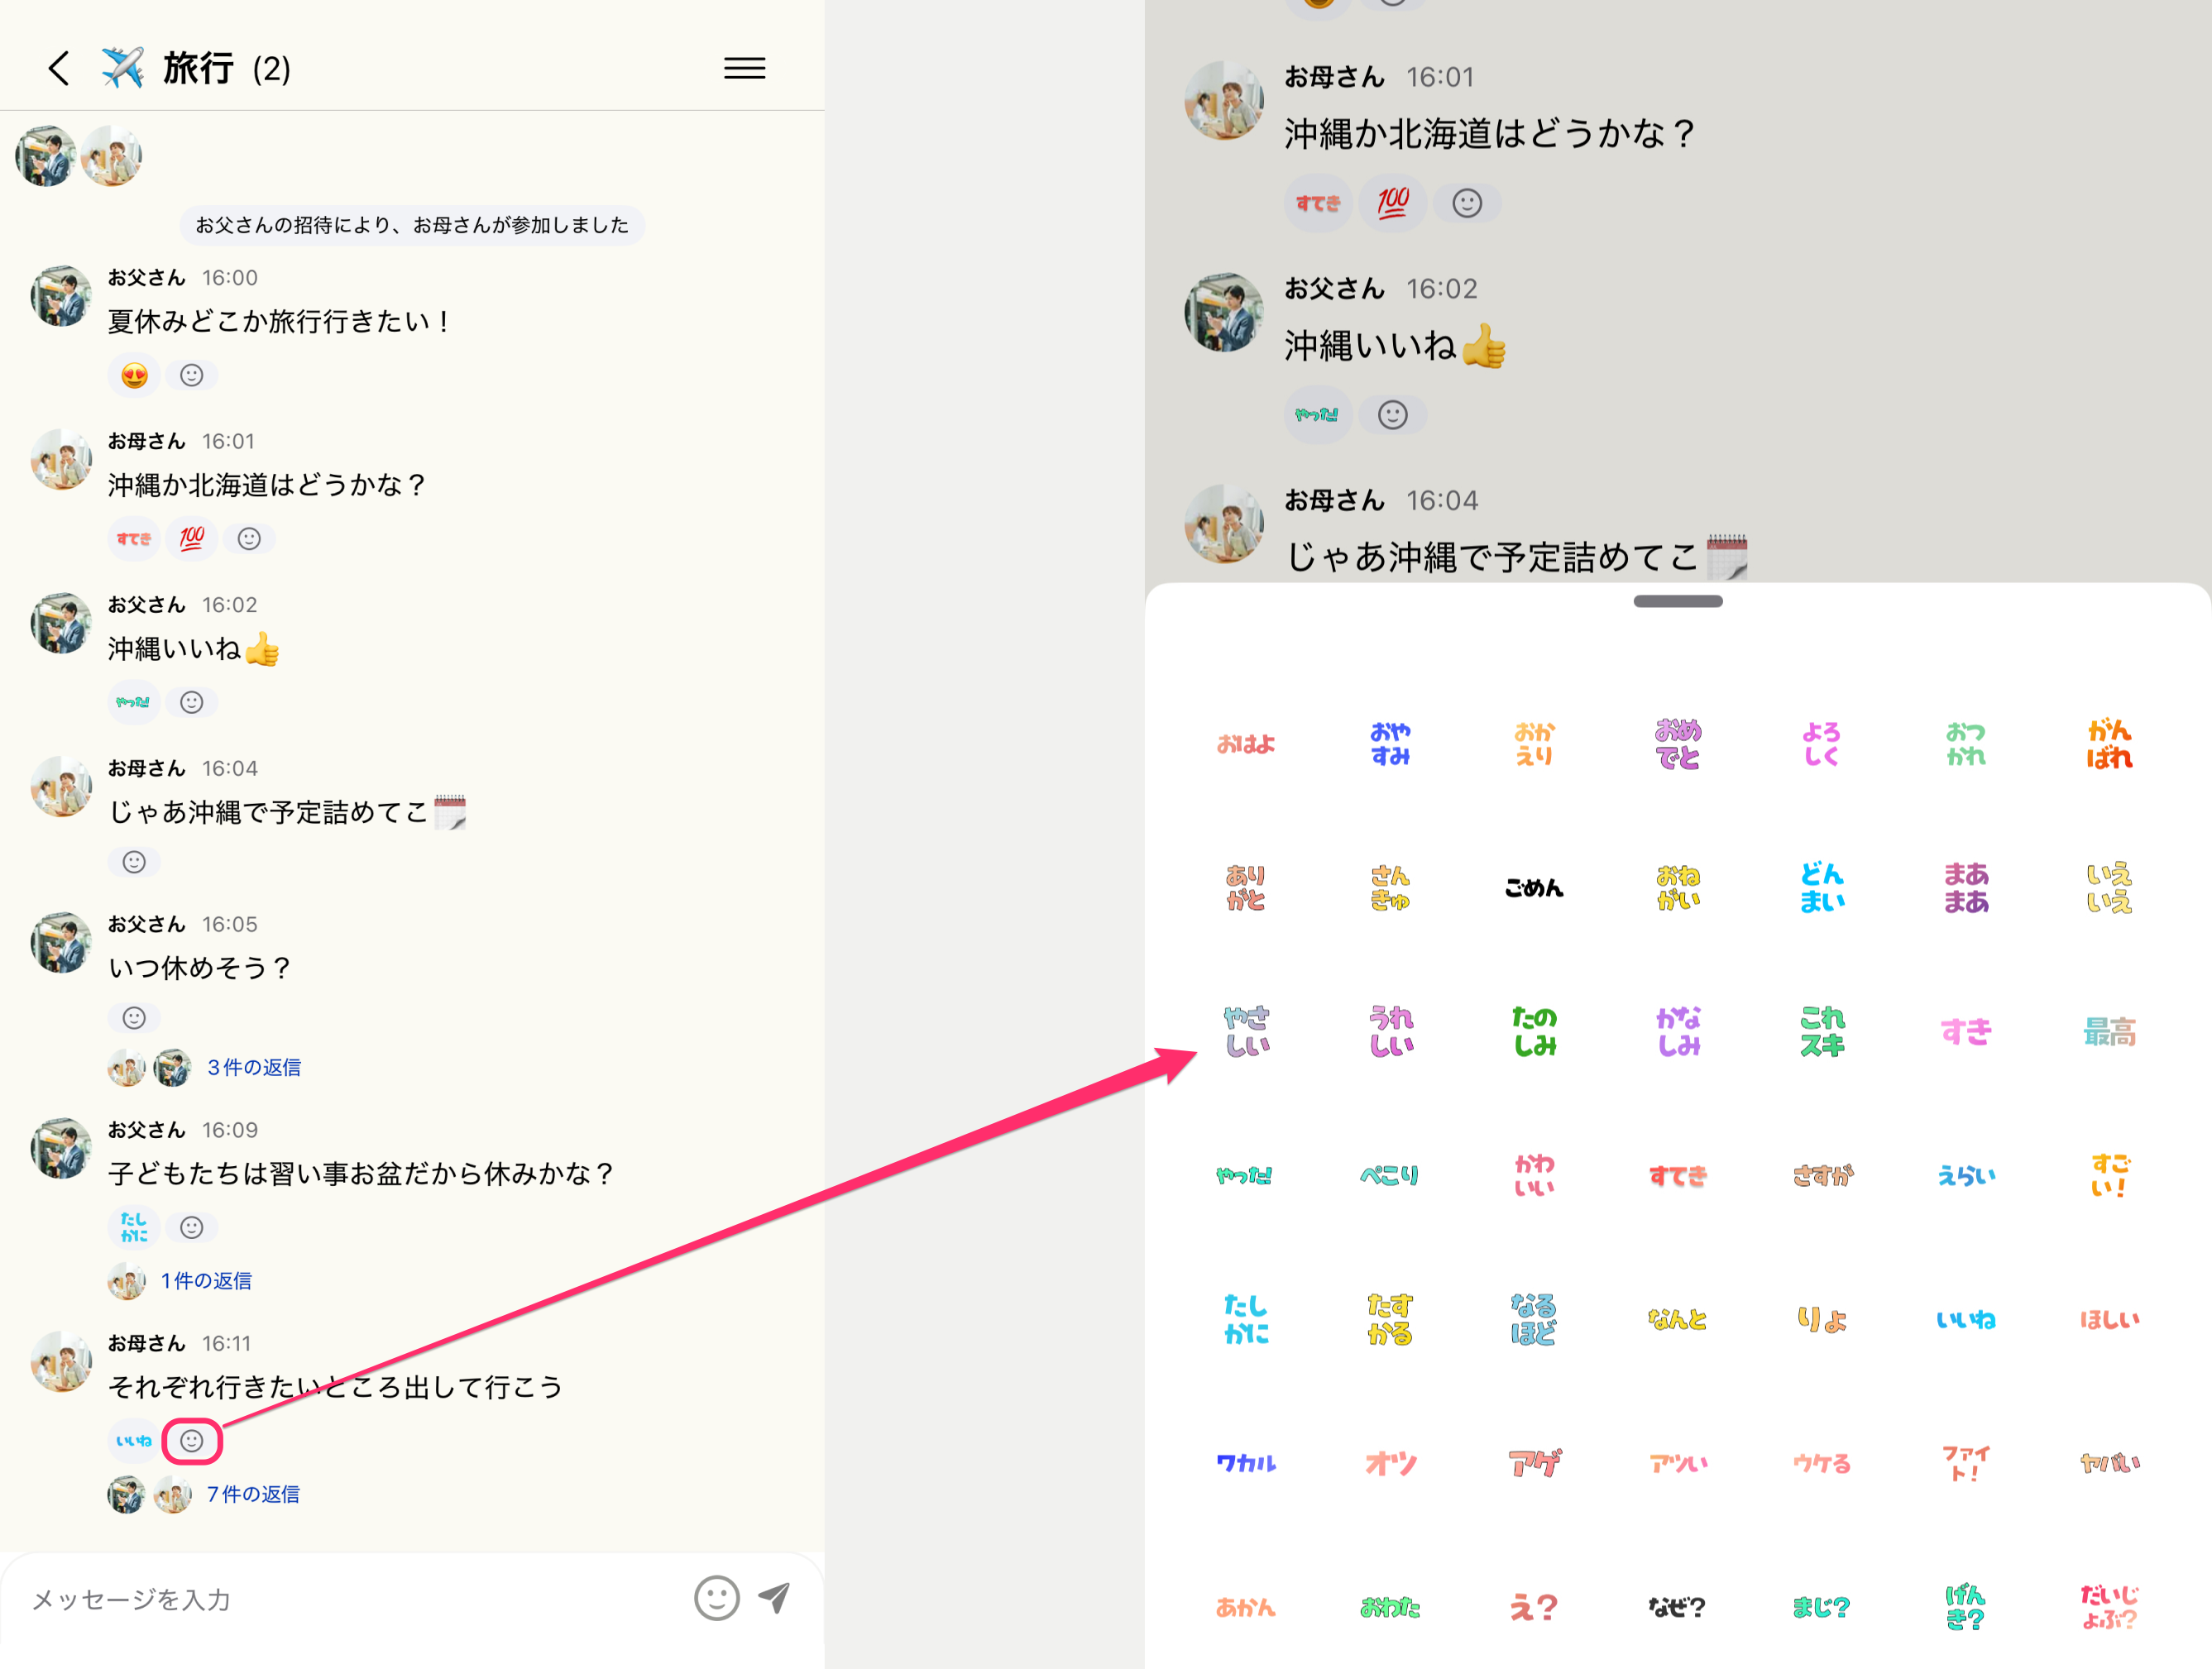
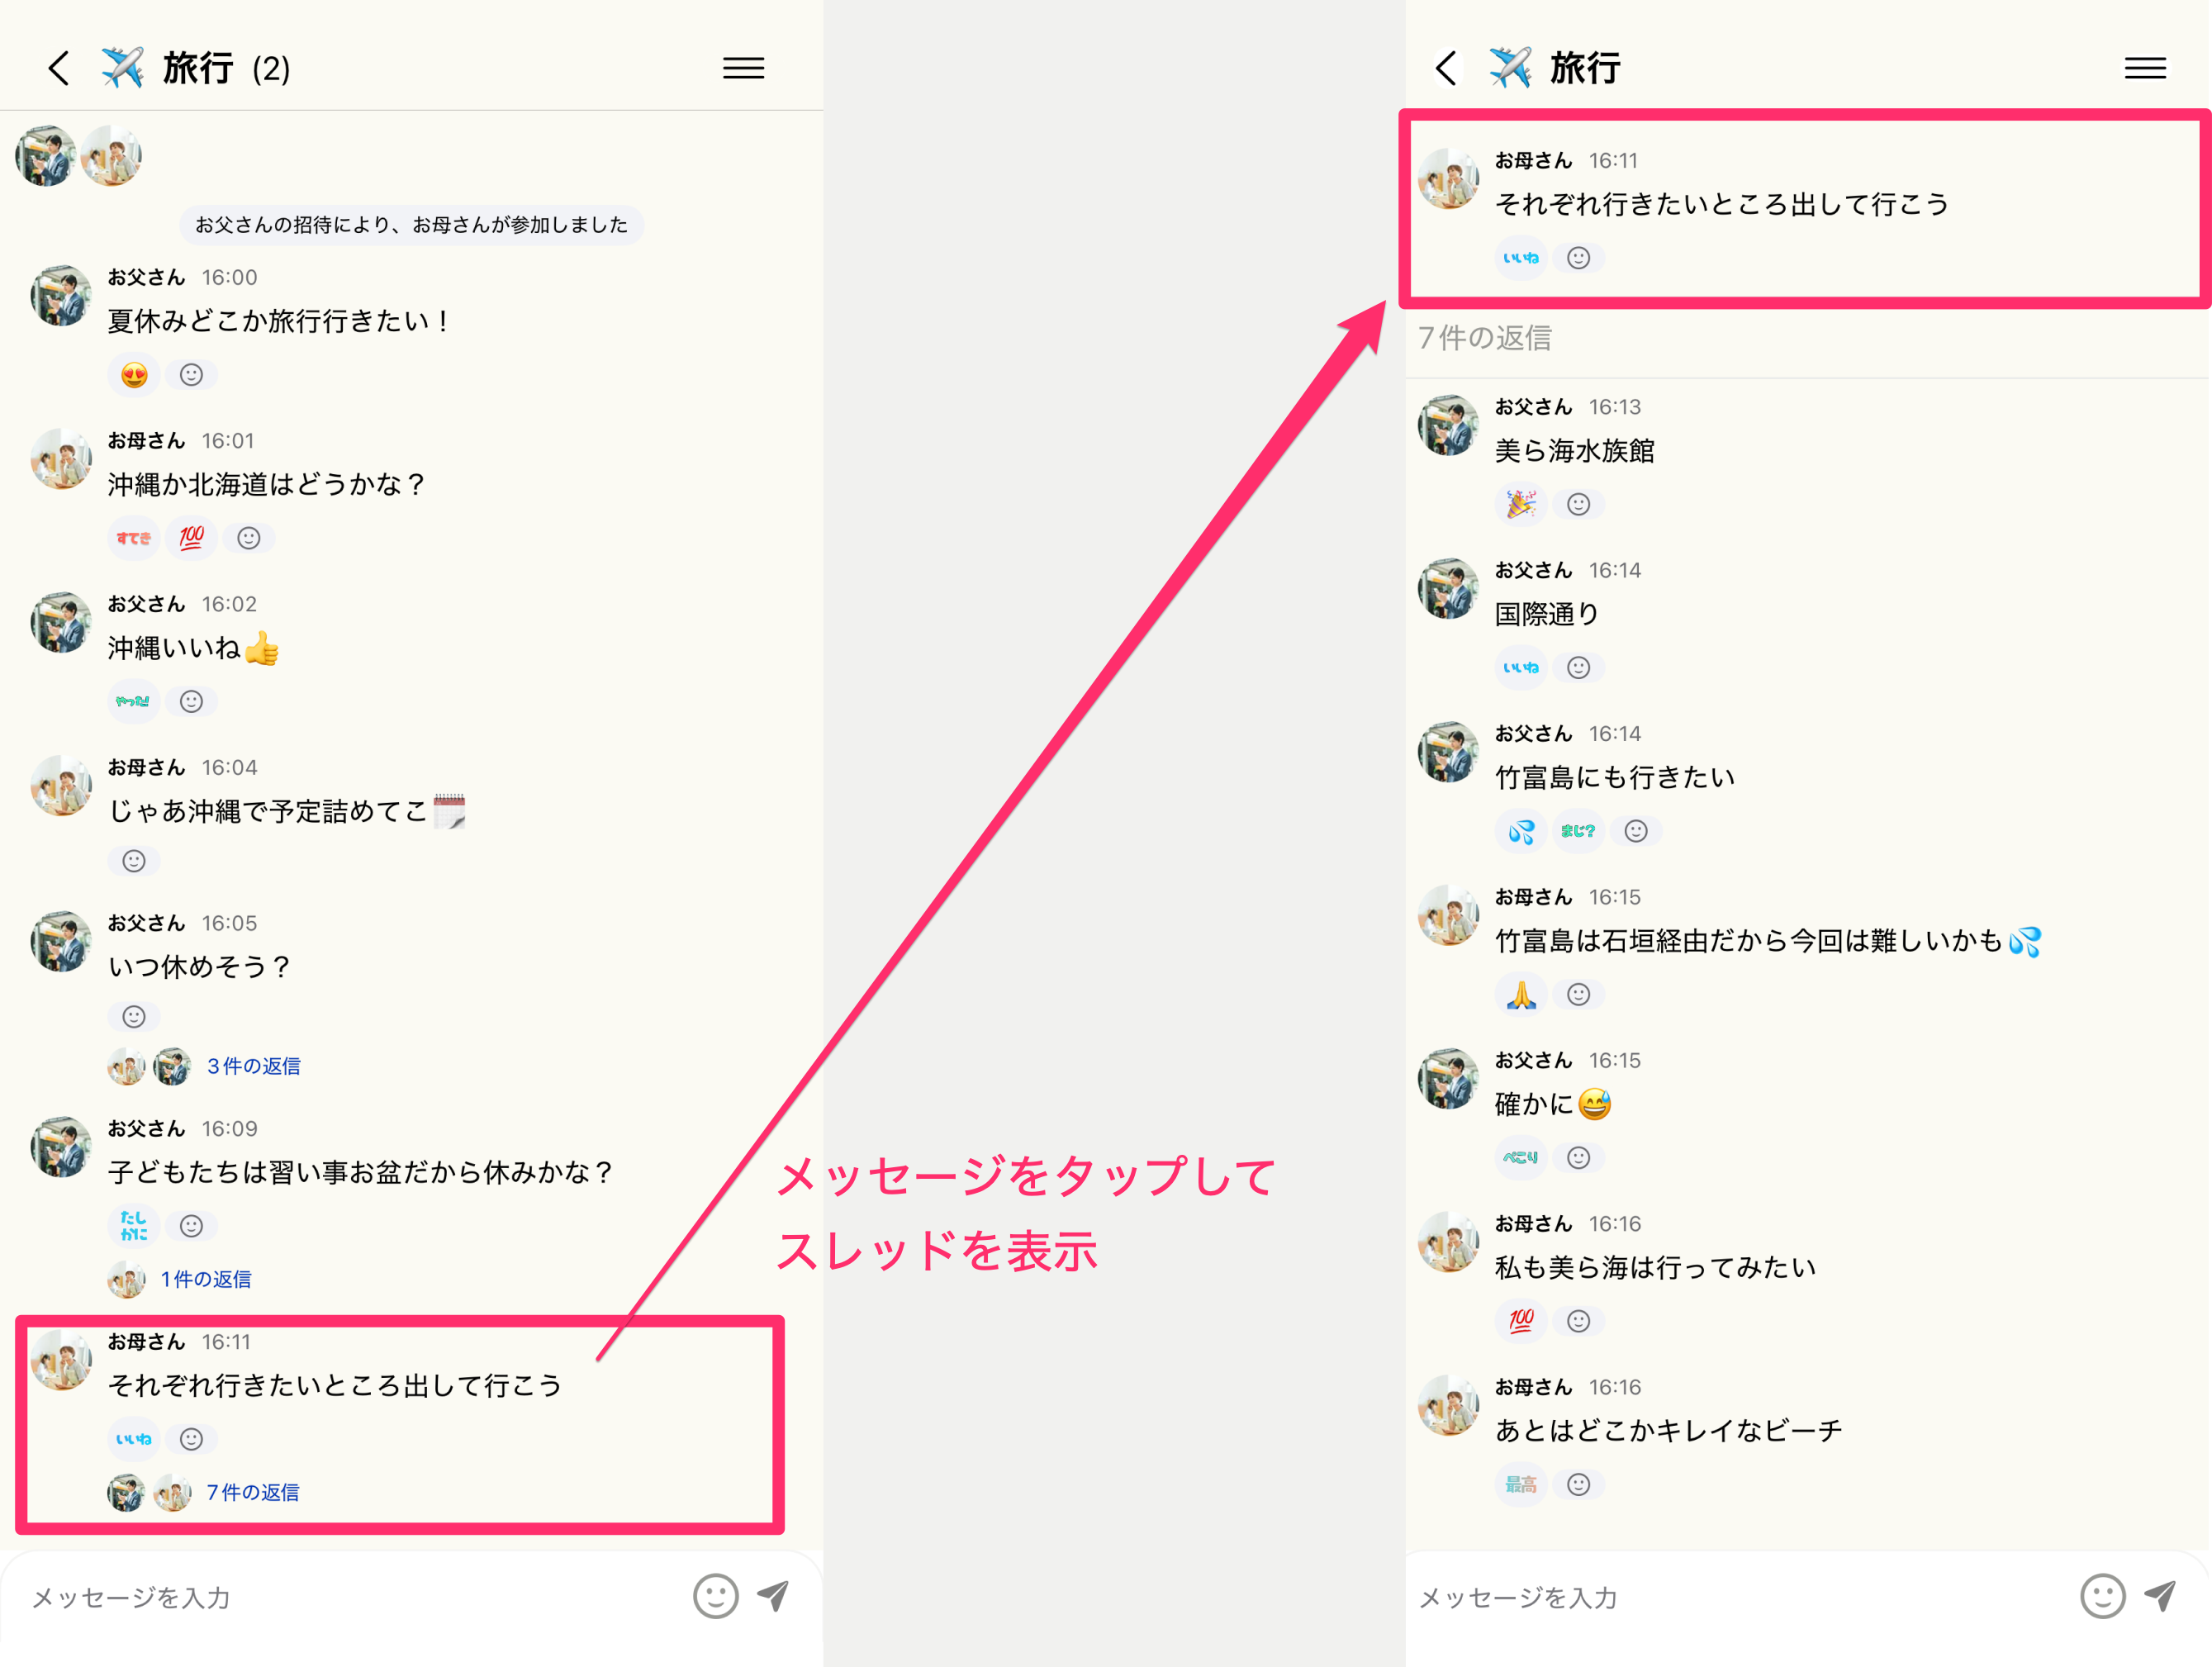
Using a Talk Room
Add more family groups
You can create separate family groups for grandparents who live apart, siblings' families, relatives, and more.
Family groups you add appear in the family group list. Groups you join after being invited by another family are also added to the list.
Tap the family group name at the top left of the Talk Room list screen to open the [Family group list], then create a family group with the [Create a new family group] button. Creating a family group follows the same steps as Create a family group.
Profile

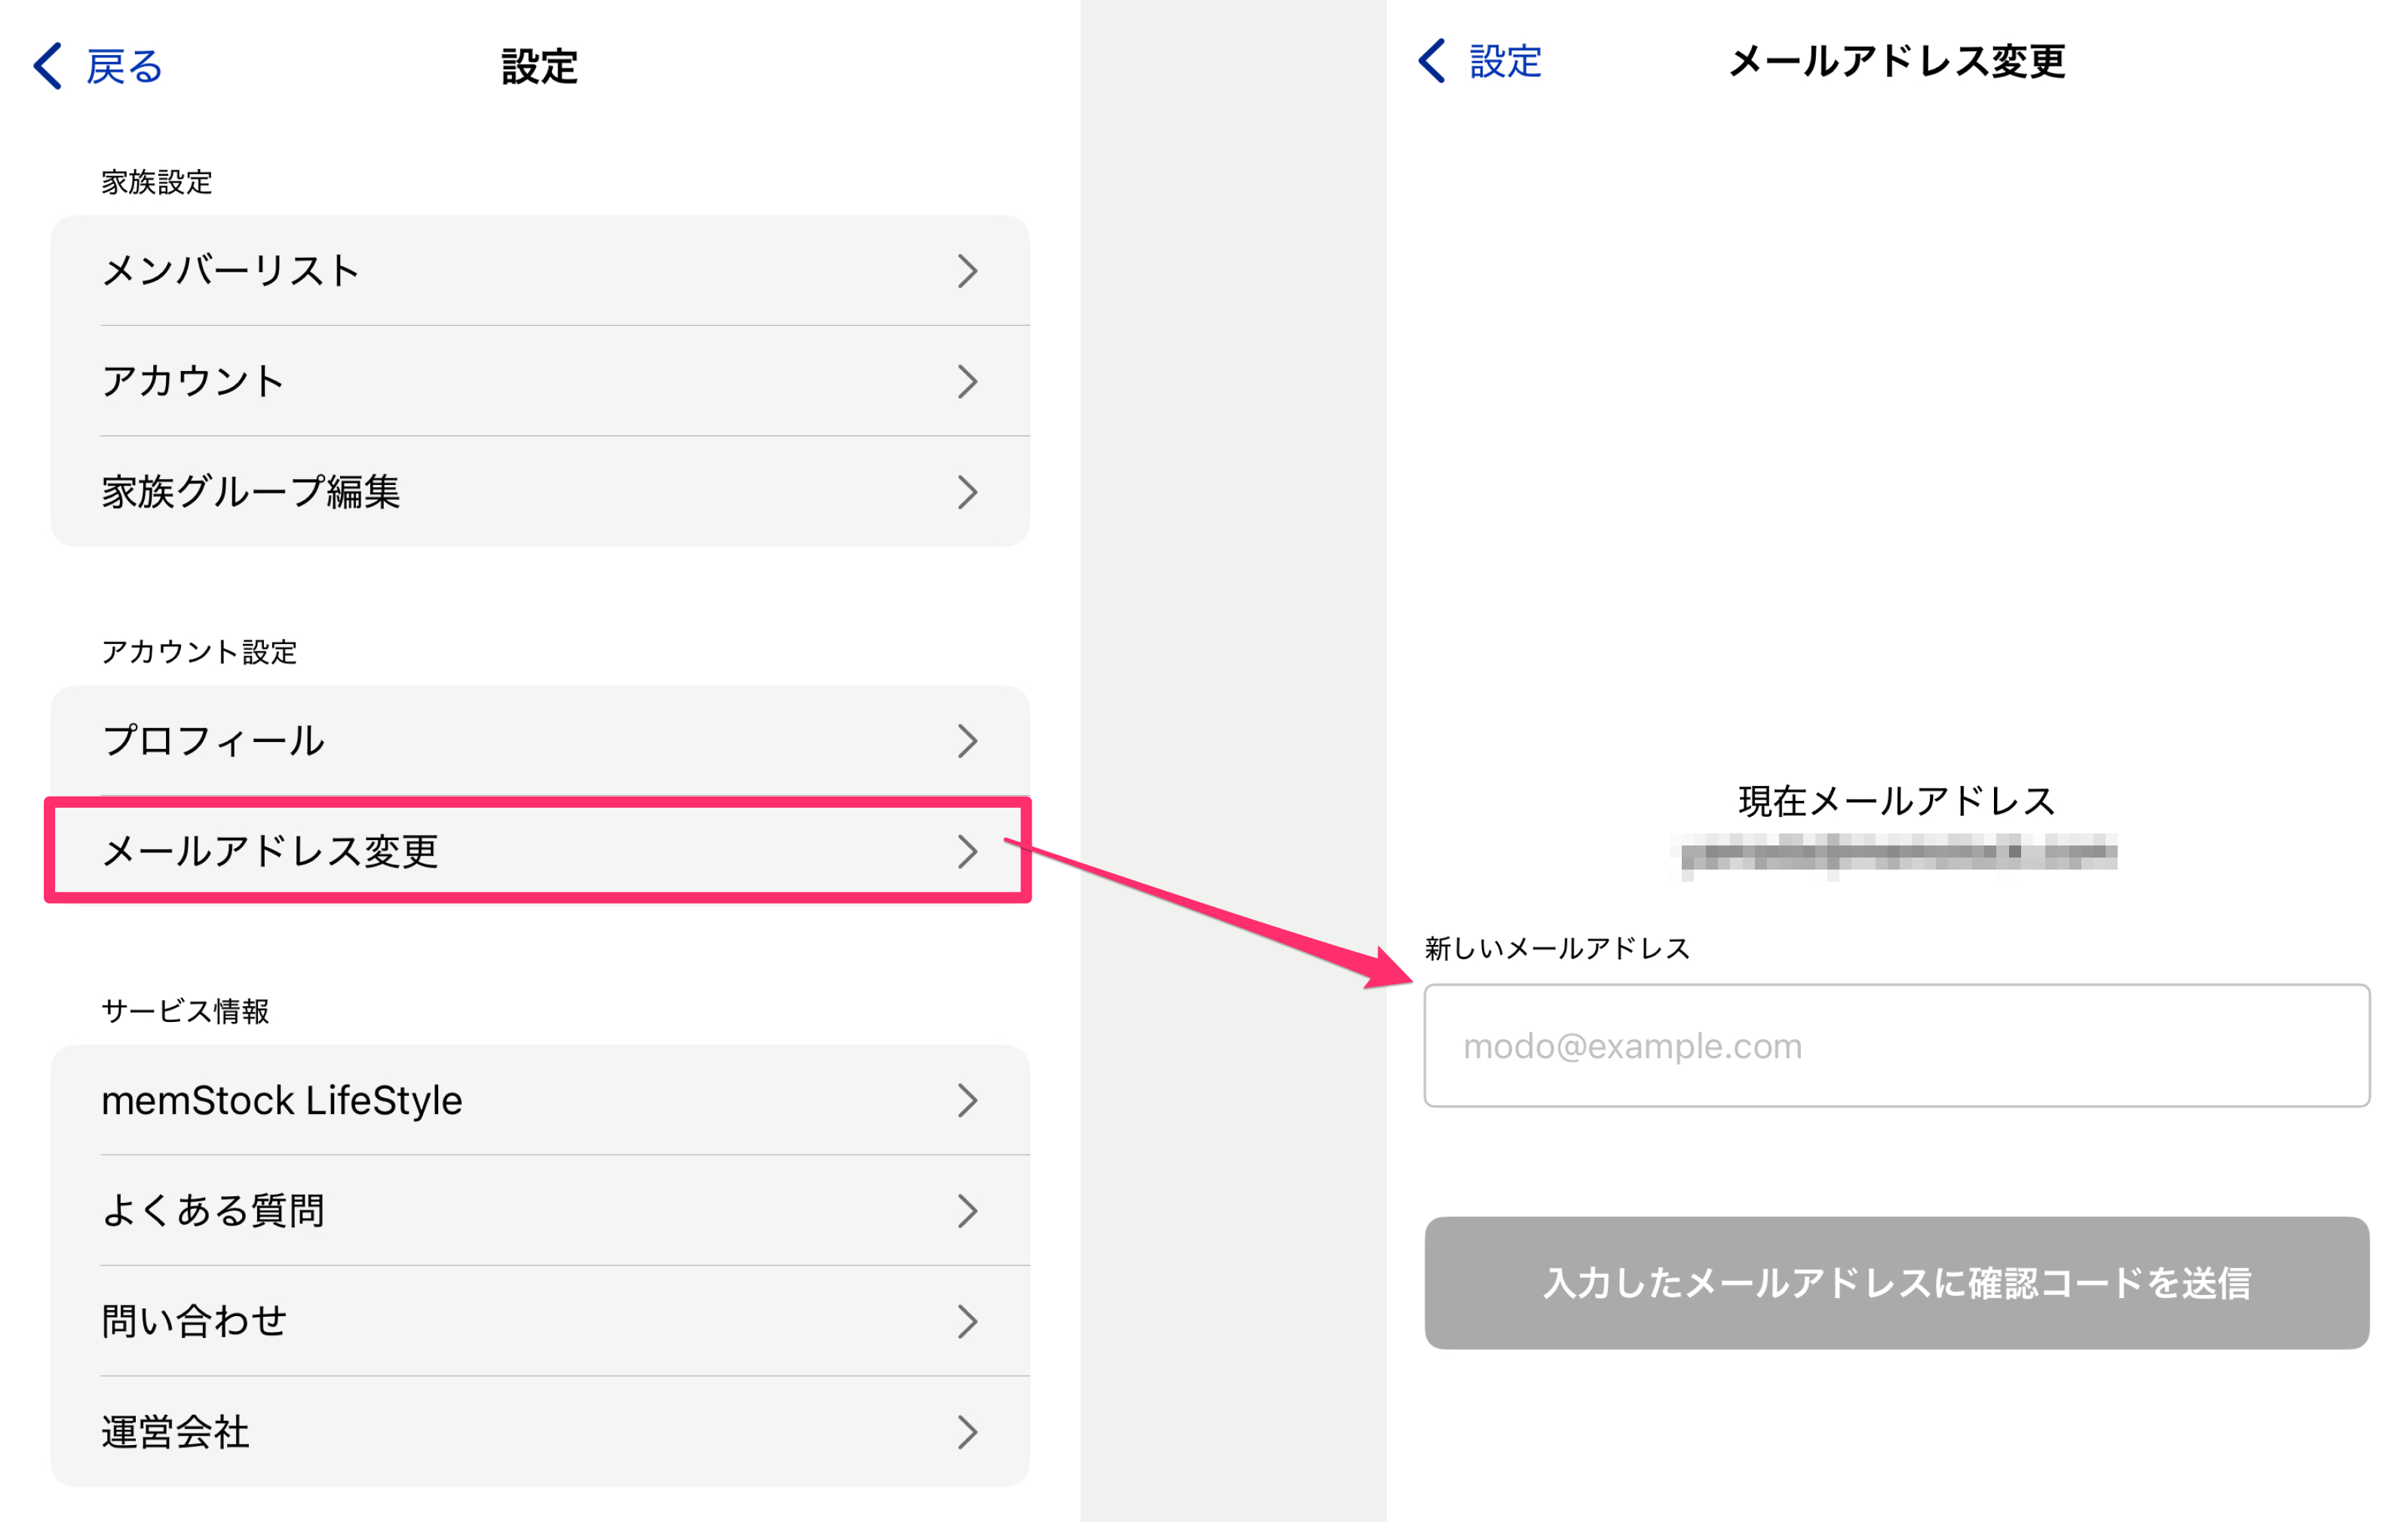
Change email address
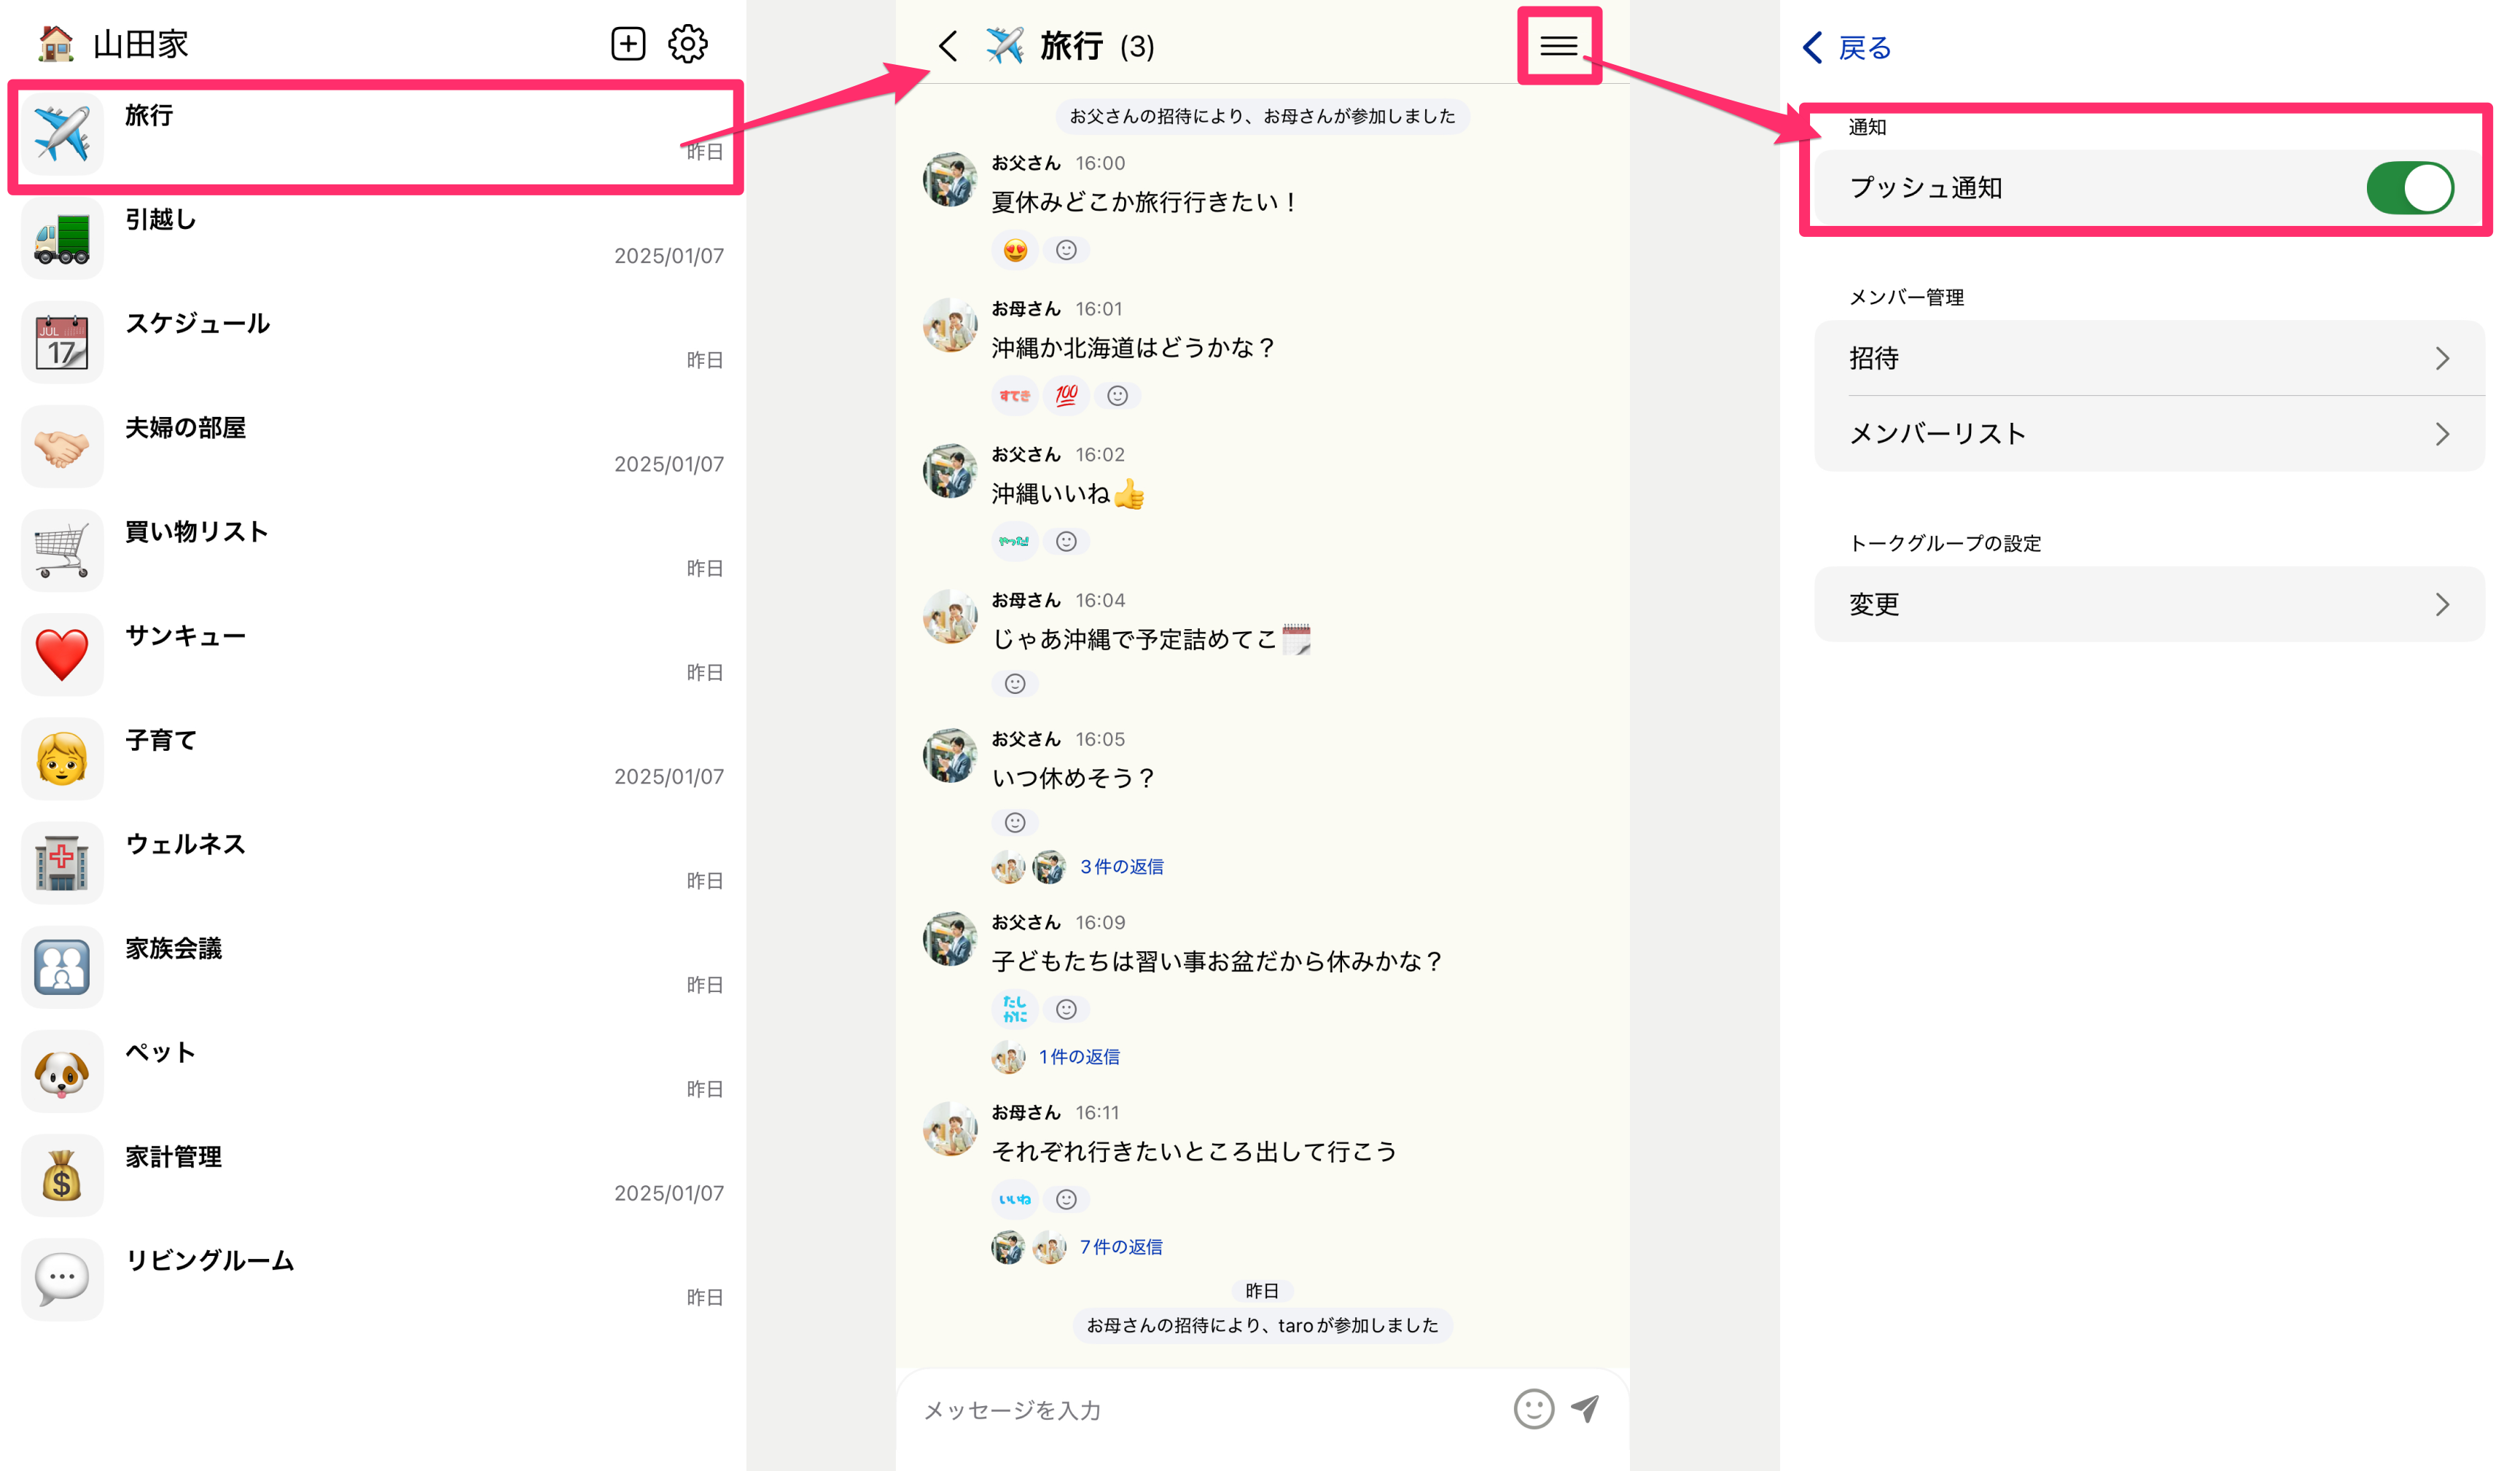
Push notifications
Create an event
- Open the "Calendar" tab at the bottom of the app, or choose "Calendar" > Show from a Talk Room's settings to go to the calendar screen.
- Tap the "+" button at the bottom right, or tap the date you want to add an event to.
- Set the title, start/end date and time, and the target Talk Room.
- Set participants, reminders, and recurrence as needed, then tap "Save."
When you save, an event thread is automatically created in the corresponding Talk Room.
Create a recurring event, such as a regular lesson
On the event creation screen, tap the "Repeat" item and select a frequency.
- Daily / Weekly / Monthly / Yearly
You can also specify an end date (repeat until a certain date) or a number of occurrences.
Even for events created as recurring, you can change a specific day or all occurrences from a specific day onward. Use this when, for example, a lesson's day of the week changes starting next month.
Editing a recurring event (how to choose "This event only," "This and following," "All")
When you edit a recurring event, a screen appears for choosing the scope to apply the change. Choose based on your situation.
- This event only — When you want to change the time or content for just that day (e.g., move only this week's meeting 30 minutes later). It's recorded as an exception event, and the other occurrences stay as they were.
- This and following — When you want to change the ongoing rule from the selected event onward (e.g., change the day of the week starting next month).
- All — When you want to change everything, including the past (be careful, as history is also rewritten).
Deletion can likewise be chosen from the same three modes.
Invite family members to an event
- Tap "Participants" on the event creation/editing screen.
- Select the family members you want to invite and save.
Invited people can choose "Going," "Not going," or "Undecided" on the event details screen, and can change it later. Note that members who are not in the Talk Room won't see the invited event and won't receive notifications.
Set an event reminder
Open "Reminders" on the event details screen and set how many minutes/hours before the start to be notified.
Reminders are saved individually per participant, so each family member can set the timing that's easiest for them. Note that for events you've switched to "Not going," the reminder settings button is not shown.